I’m no expert seamstress. I do, however, have a sewing machine, which has been woefully underused. Much of the problem has been a lack of confidence. There’s fancy jargon that I haven’t a clue what it means; I’ve just been doing simple things, figuring it out as I go along. I’ve been pretty sure I’ve been managing to do that stuff right – in no small part because it comes out the way I need it to! – through application of logic and whatever vestiges of sewing knowledge remain buried deep within my brain from childhood.
See, my mom sewed a whole lot when I was a kid. She made all – or at least many – of my Halloween costumes. I didn’t even know about the existence of the disposable costumes that populate stores every October until I was a teenager. I’ve never had to wear one of those, for which I’m so grateful. I loved my proper costumes.
Mom sewed all sorts of things, of course. I think she taught me how to cut out a pattern at some point, and I learned a lot just by hanging around her while she was crafting. I learned some in high school home economics, where I sewed a pillow (in the shape of a telephone … which today’s teens wouldn’t even recognize, come to think of it). I remember feeling so daunted then about threading the machine, every single time I had to do it.
But hey, sewing is a needed thing in my world – I have to hem pants, because they never make them the right length for me. Things need mending (and I despise throwing things out); things need altering (again, I’m not shaped like a runway model); small things can be whipped up quickly and add so much to the home. So, right, I’m going to have to do this sewing thing.
For a long while, I just figured it out as I went along. My sewing machine came with basic instruction on how to use it – threading this one is quite painless, thankfully. The first thing I think I did was sew some basic curtains to hide away this awkward alcove we have in our living room. All I had to do was cut a rectangle of fabric the right size and then hem up all four sides. Well, two rectangles cause there’s two curtains. I managed! 😉 Little things here and there got figured out and accomplished. Still, dragging out the sewing machine was a chore.
Then I won a bursary (scholarship) to Denman College, the Women’s Institute‘s own adult education college. I was so thrilled to go – I’d always heard such wonderful things about it. I poked and prodded endlessly before finally settling on a course – two, actually. I looked at the course cost, the train fare, and the bursary, and decided to make the most of my train fare by taking two courses: one right after the other. I booked two sewing courses (Sewing Machine Magic and Nip and Tuck: Altering Clothes), both run by May Martin, and she and I would be there from Monday afternoon to Friday afternoon, at the end of April.
I had no idea who May Martin was. When I got there, I found out she’d been a judge on the Great British Sewing Bee, which had just been on tv (and filling up my twitter feed) the month before. She’s quite a likeable person, and during the tea breaks (this is England, people honestly can’t function without tea breaks) she told us what it was like being on the show, and answered all the questions about that lobbed at her. Far more than that, she gave us wonderful instruction, not least of which was that she answered every single question asked of her in class, too. I asked many of them; I always want to dig until I really understand something, and she never once lost patience with me for that. I don’t quite get down to the little kid level of “Why? Why? Why?” with no end in sight, but … sometimes I get a bit close to that. She always answered with a real and true answer, and for that she’s one of my favorite teachers ever.
Most of all, though, I came away from those courses with:
- a much better understanding of how my machine works,
- a much better understanding of how sewing works,
- that I don’t need to know everything about sewing to sew something,
- that I’ll probably never know everything about sewing, given that May, after 40 years of teaching sewing tells us she doesn’t know everything, and
- that I’d been pretty much right with everything I’d been doing so far.
Wewt! What a boon to the confidence that last bit was: learning that by applying simple logic, I’d worked out what I had correctly, so extrapolating from that means that applying simple logic in the future means I’ll probably work out future things correctly, too. Hah – The world is my oyster!
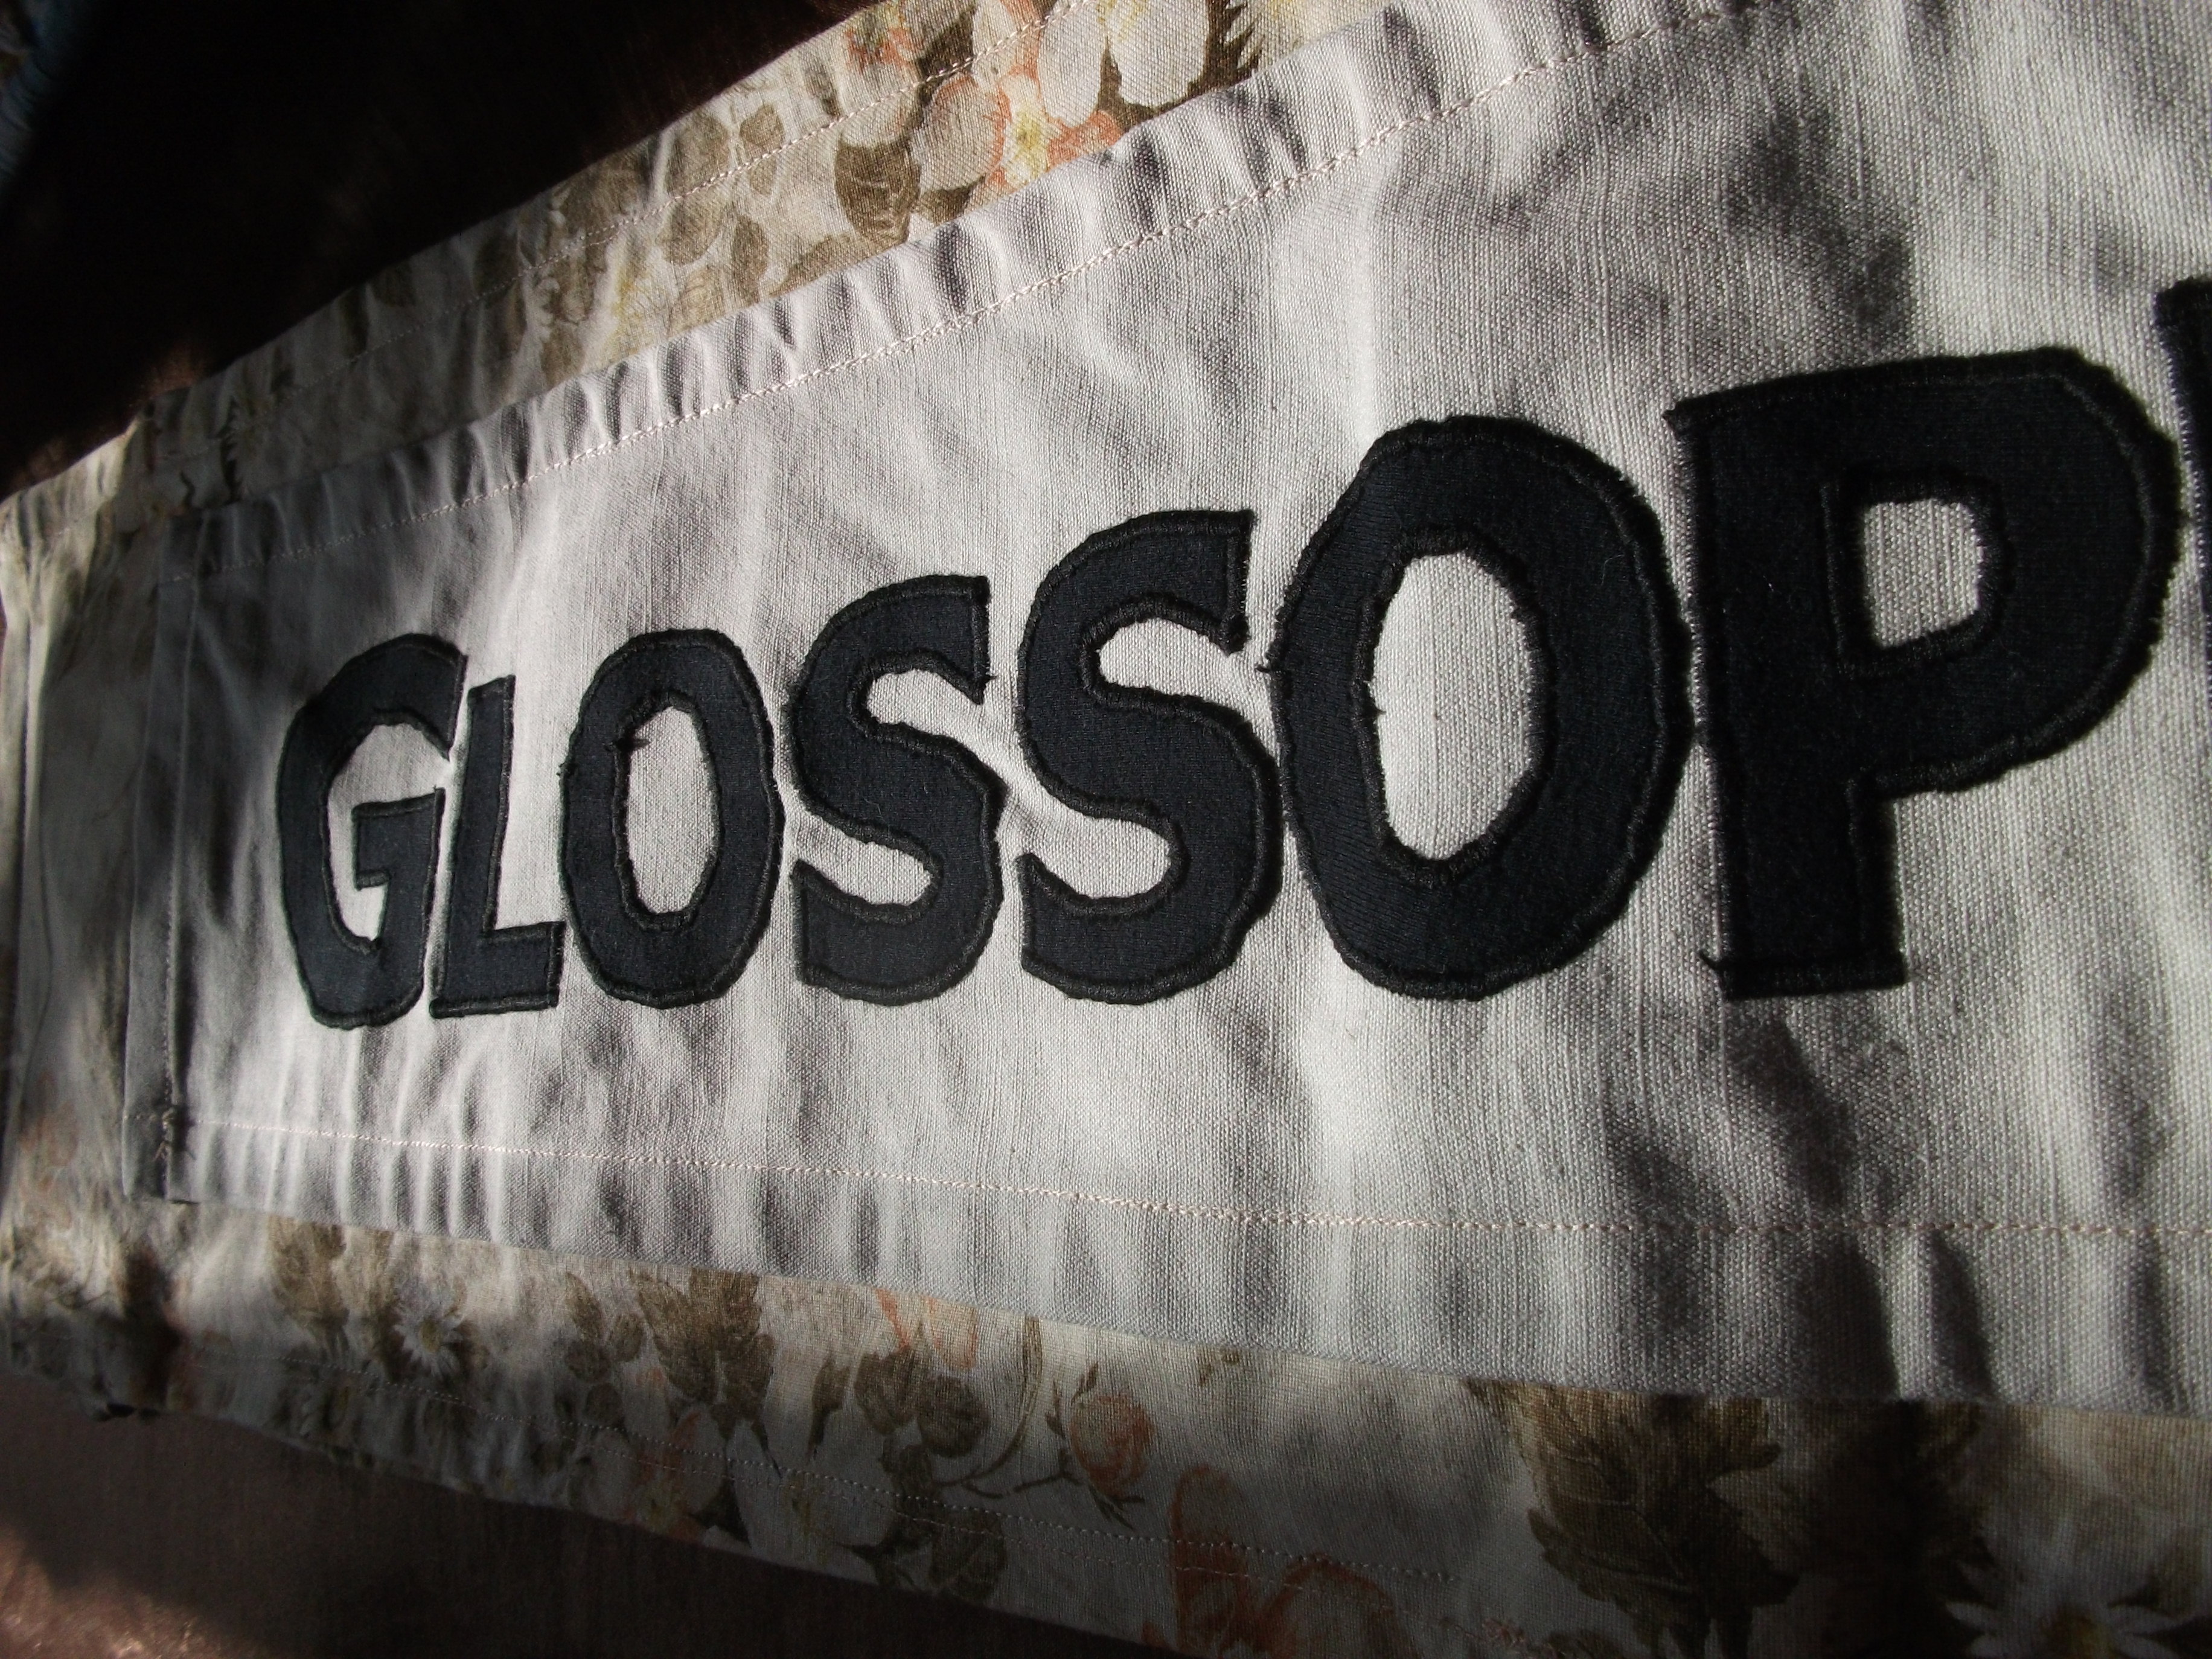
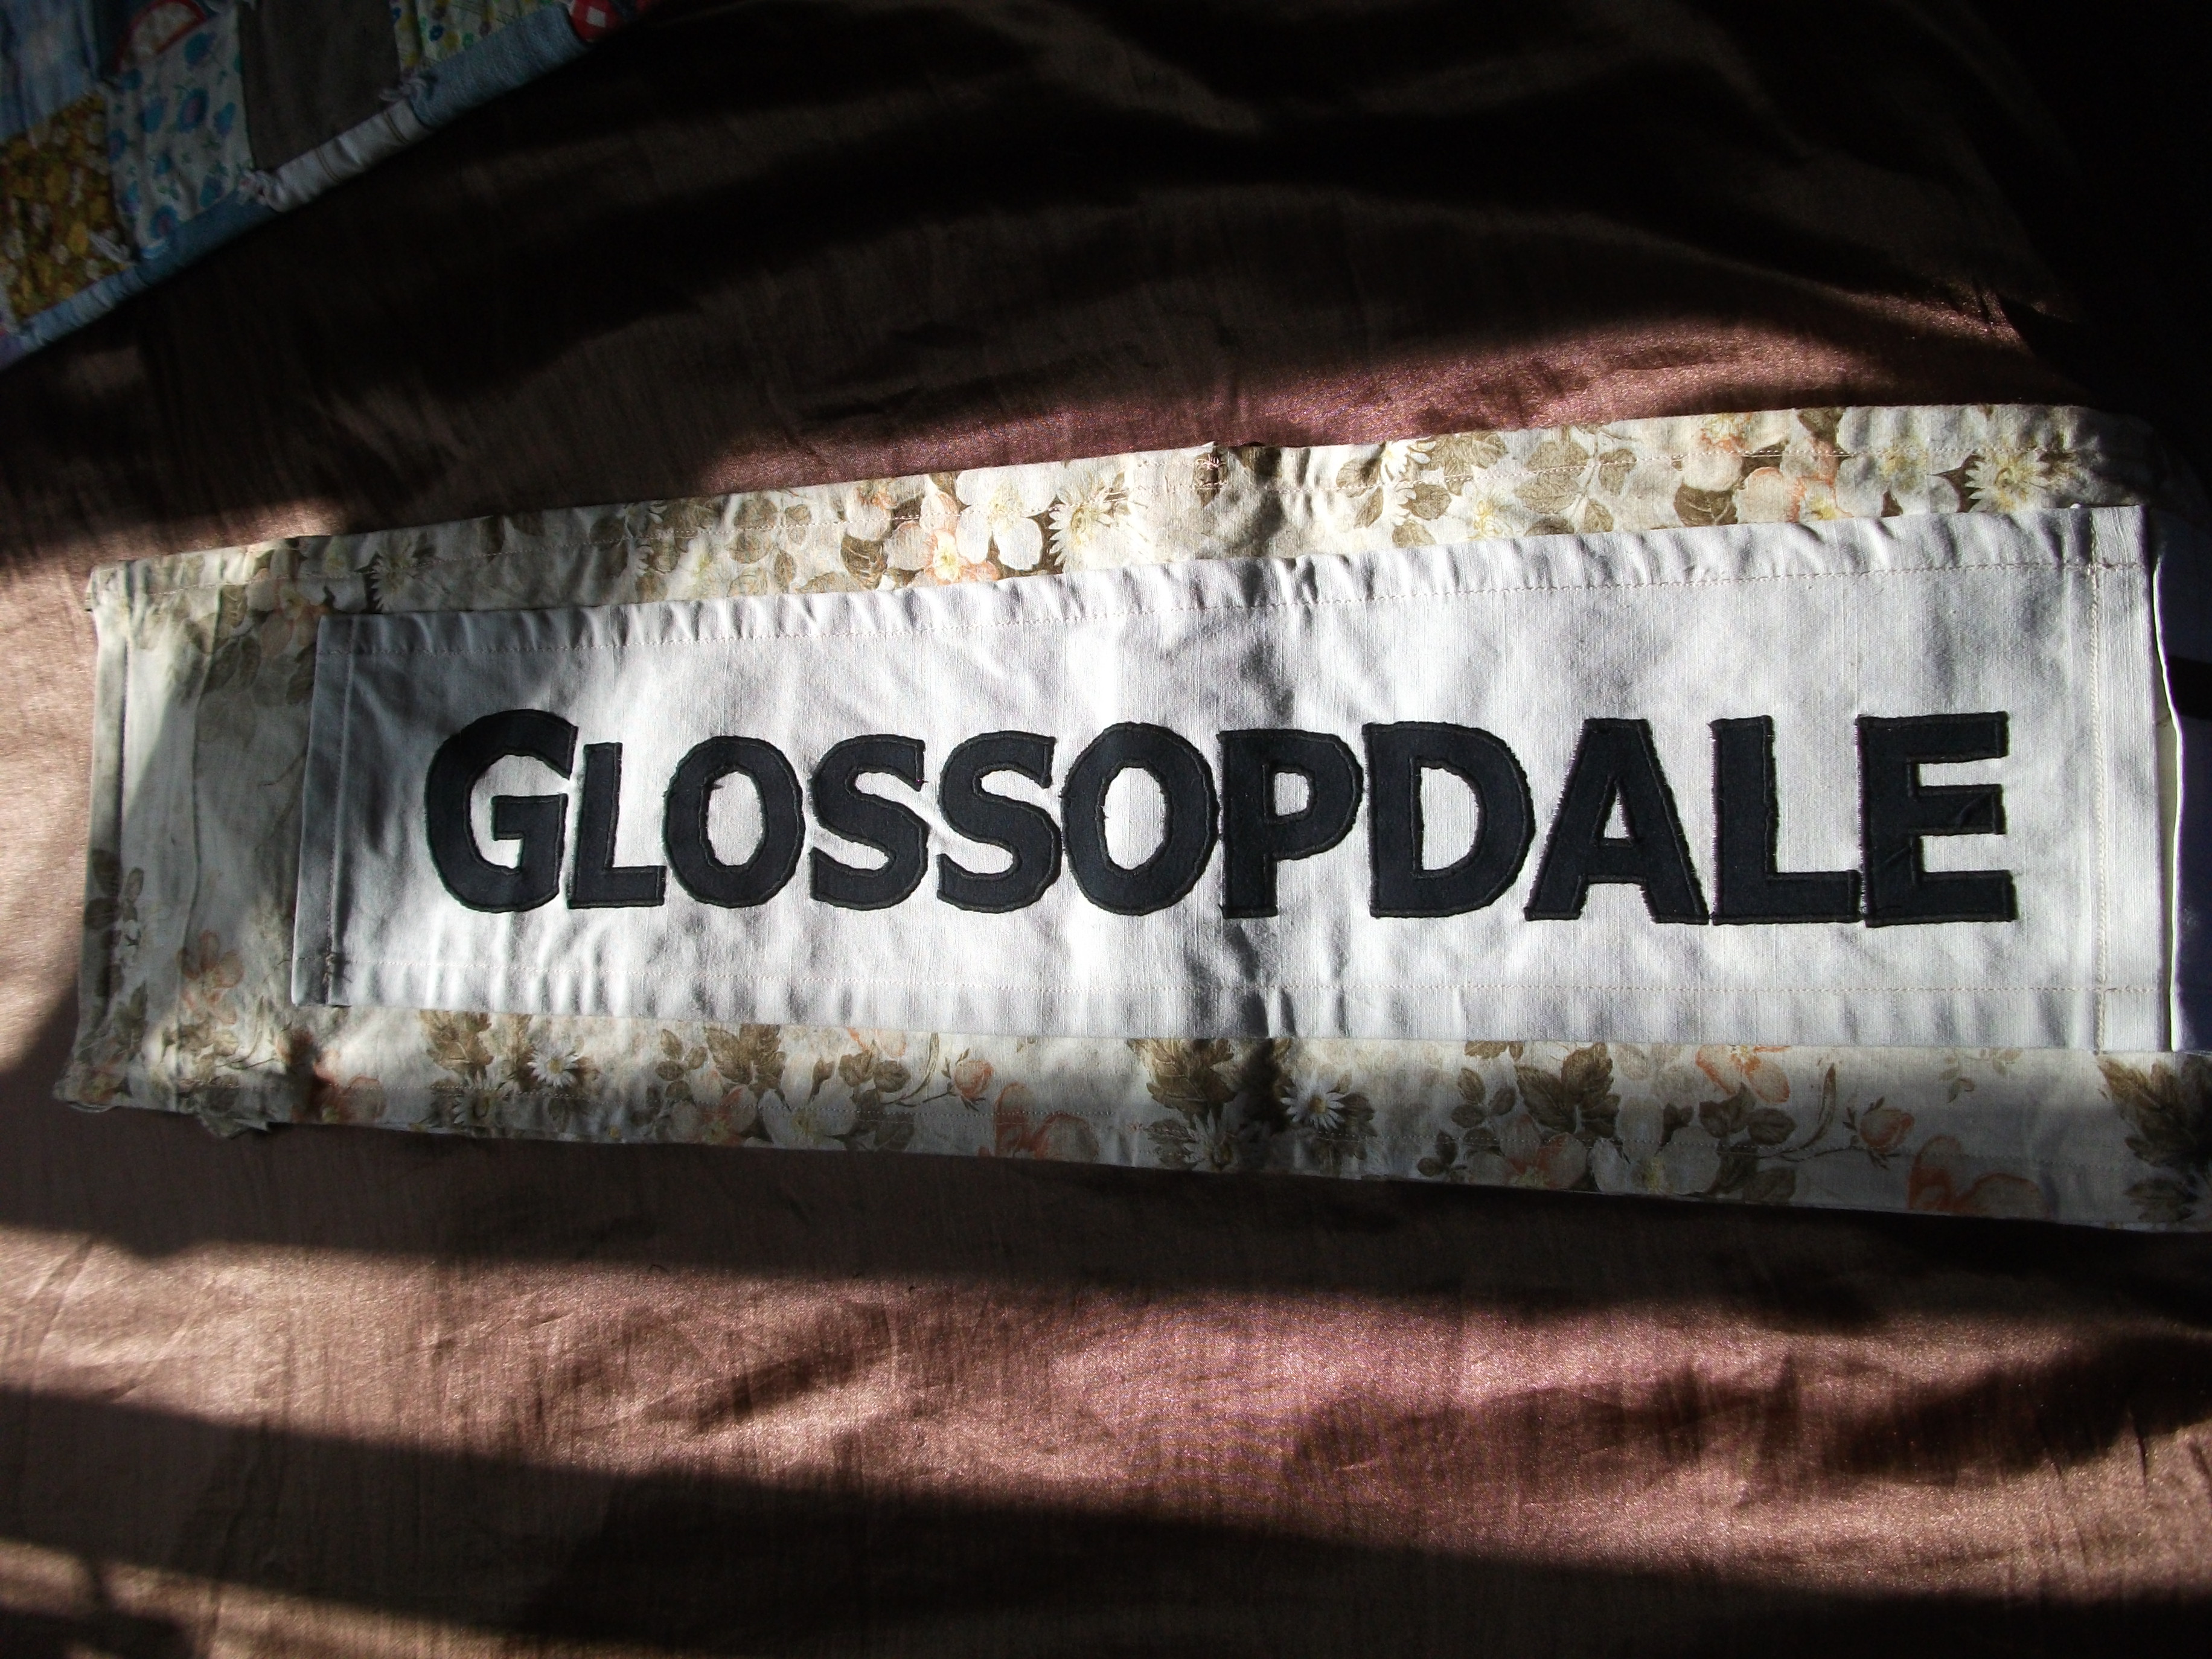
In the wake of this, when one of my groups wanted a banner to put up with its gazebo in the forthcoming Glossop Carnival, I didn’t hesitate to say I could do it. Once fabric was sorted (which was my only hesitation – fabric isn’t cheap!), I was away. I made a mock-up and took it with me when we put up the gazebo the first time (a practice run well before the carnival), and it was approved, pending a few changes. I’d pinned it all together, bearing in mind May’s mantra that pins are great because you can always take them out and re-do them. 🙂 So, changes made, off I went.
 |
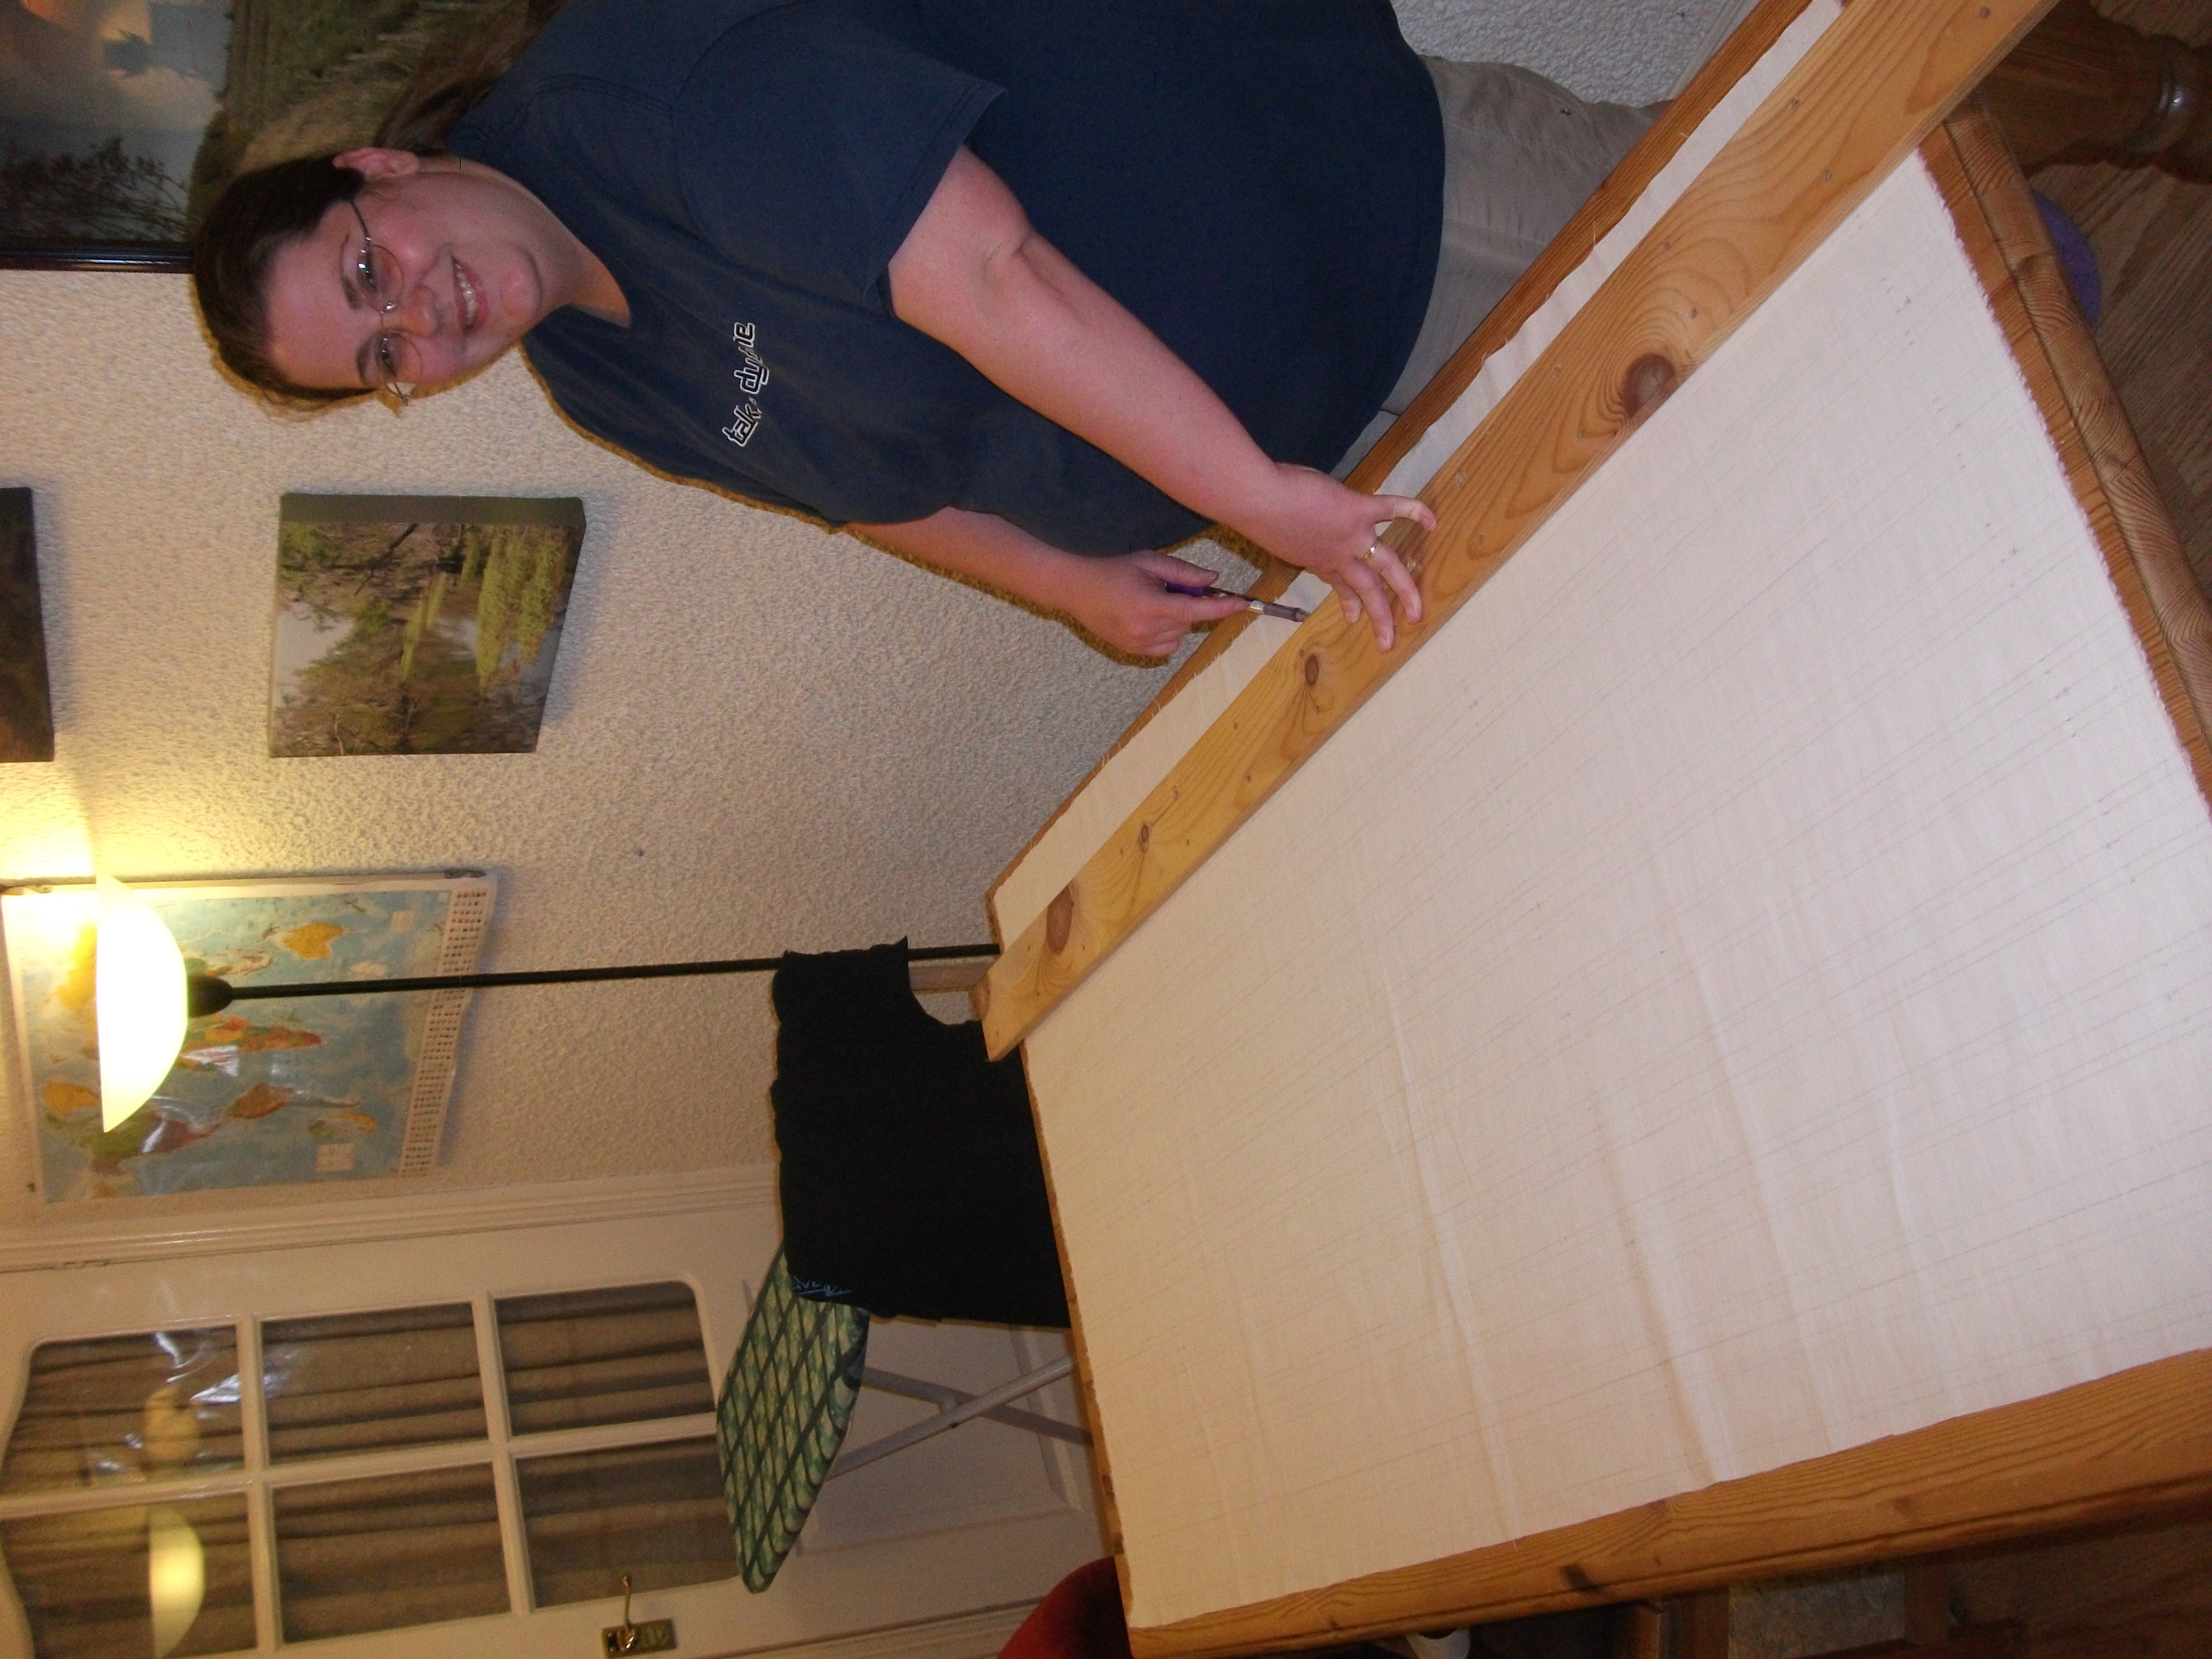 |
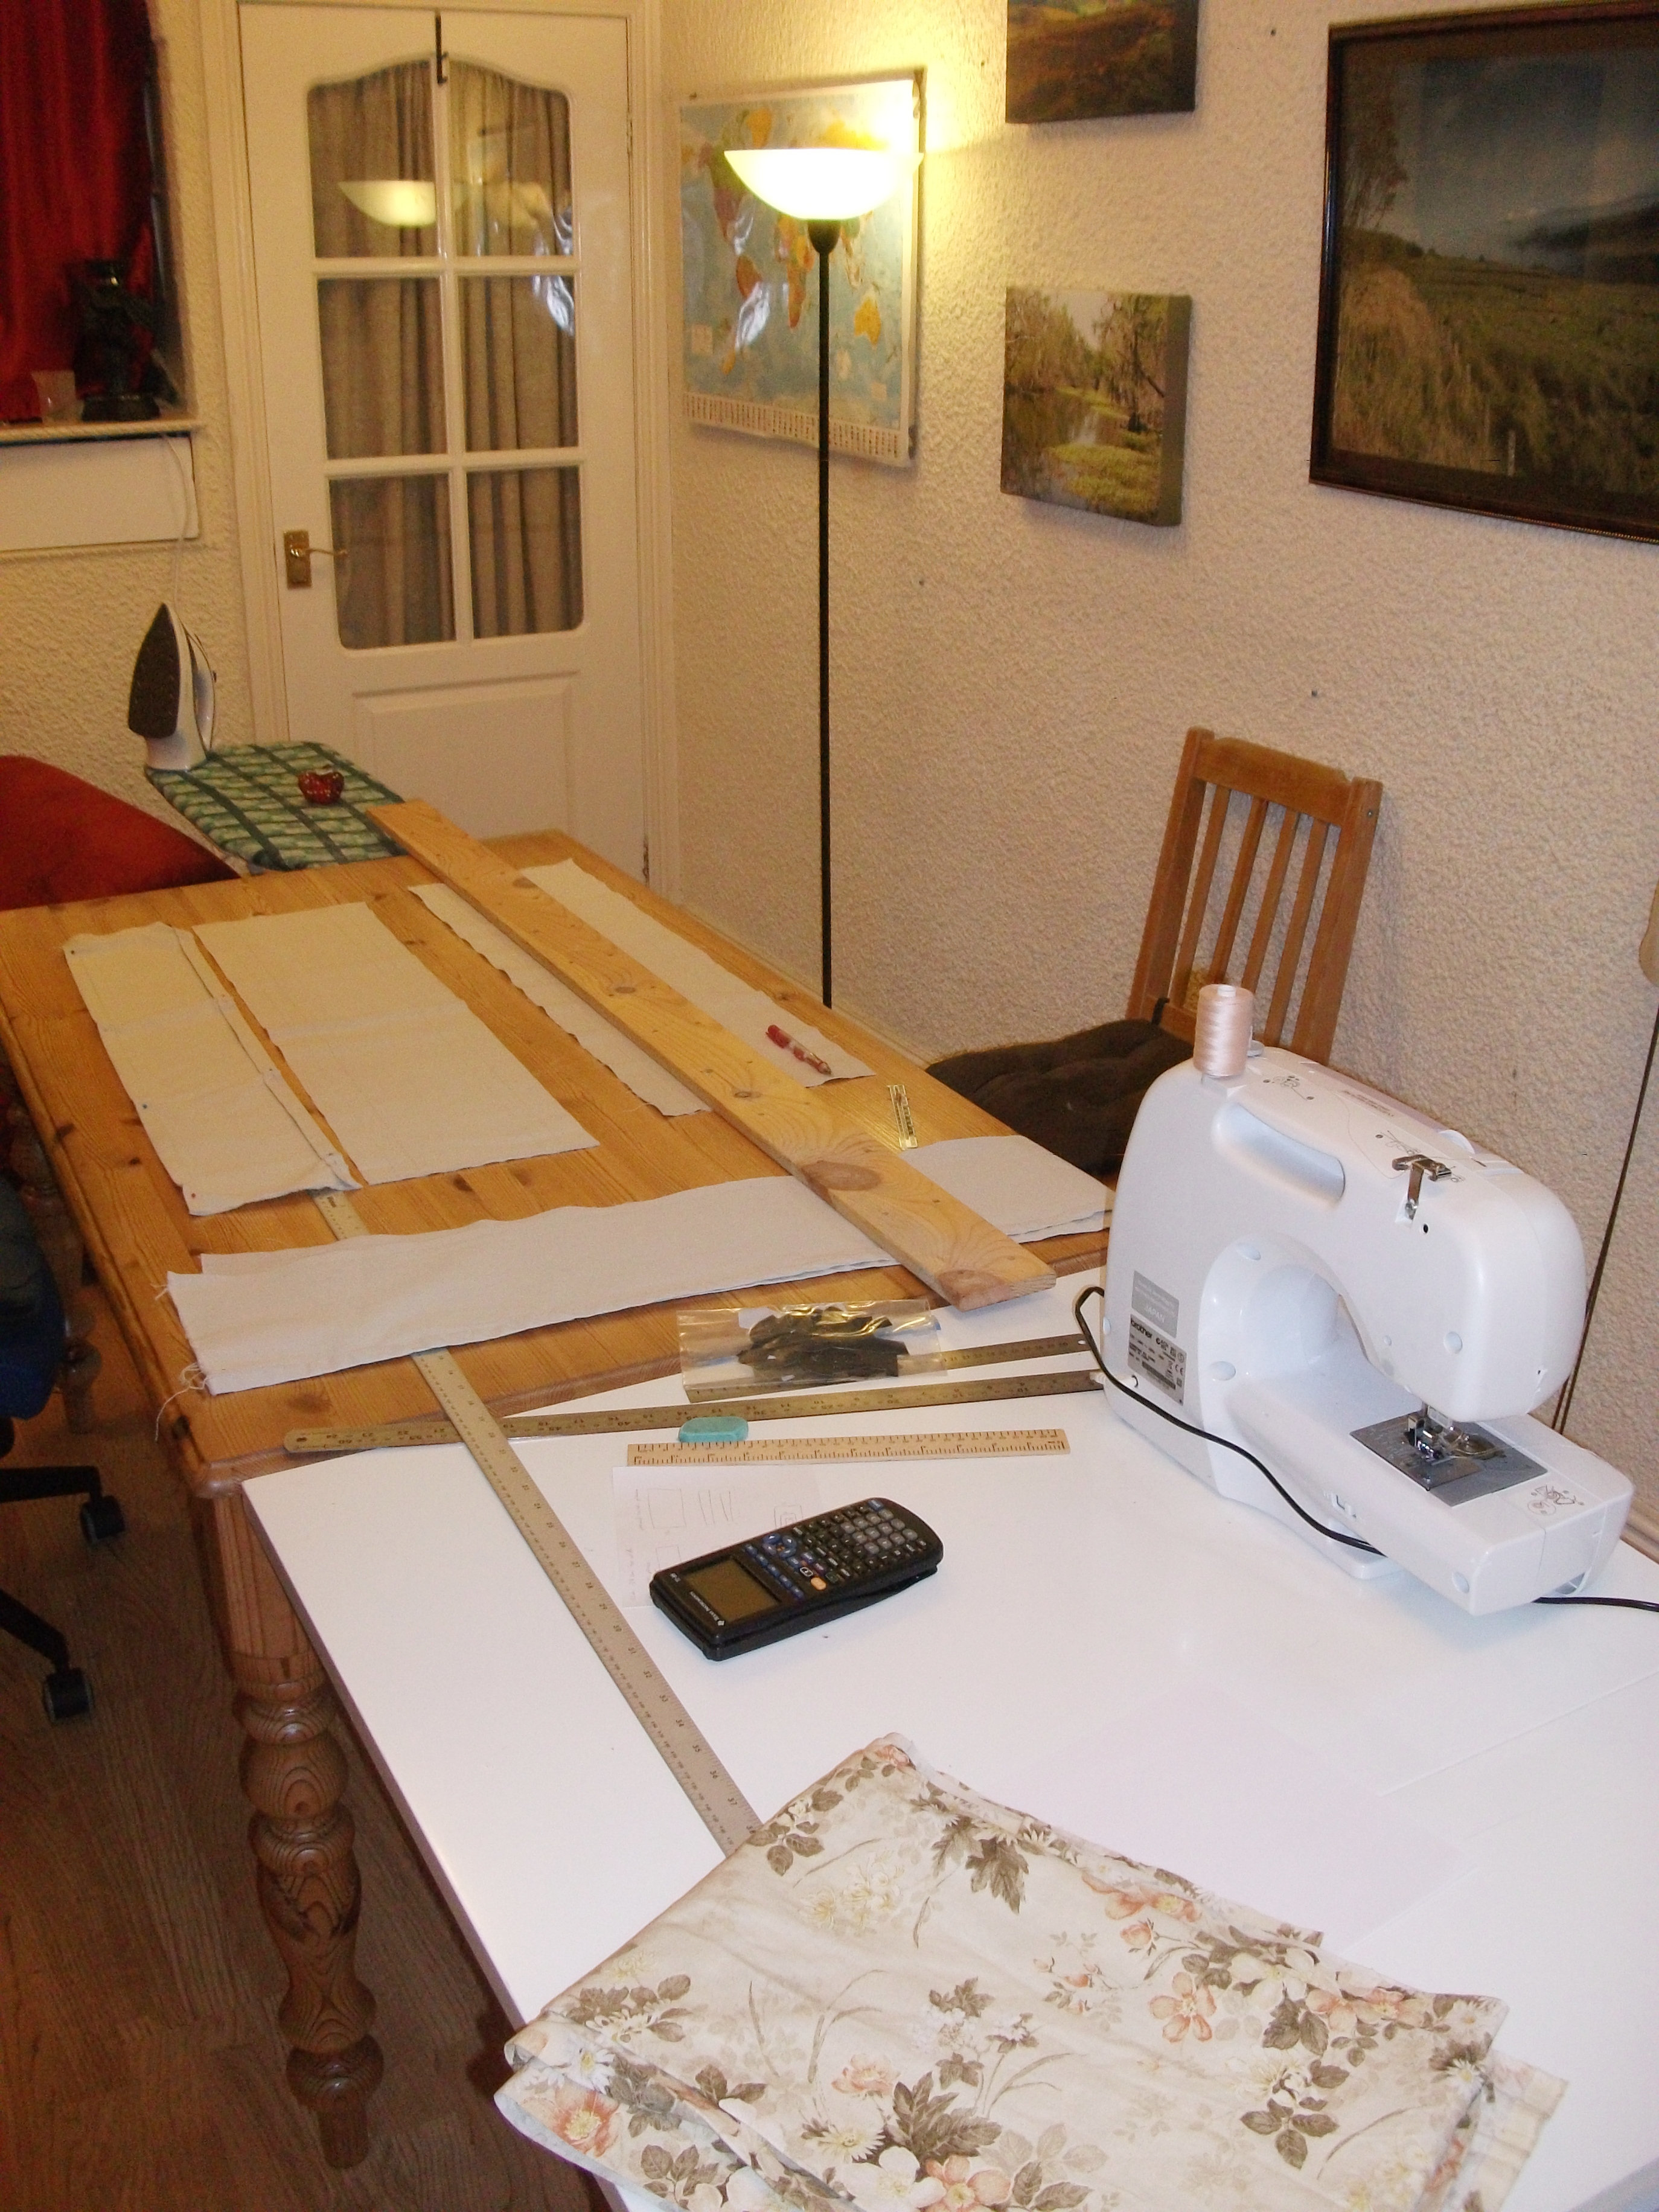
I’m going to use the floral fabric as the background, then the gray fabric on top of that, and then put black lettering on top of that. On the right, you see me with my straight edge for marking fabric. I love this straight edge: it’s heavy enough that it stays put, and long enough for any fabric I’ll be working with. Here I’m using it to mark the lines I’ll need for the fabric edging for the display boards Chris is making. You’ll see those later.
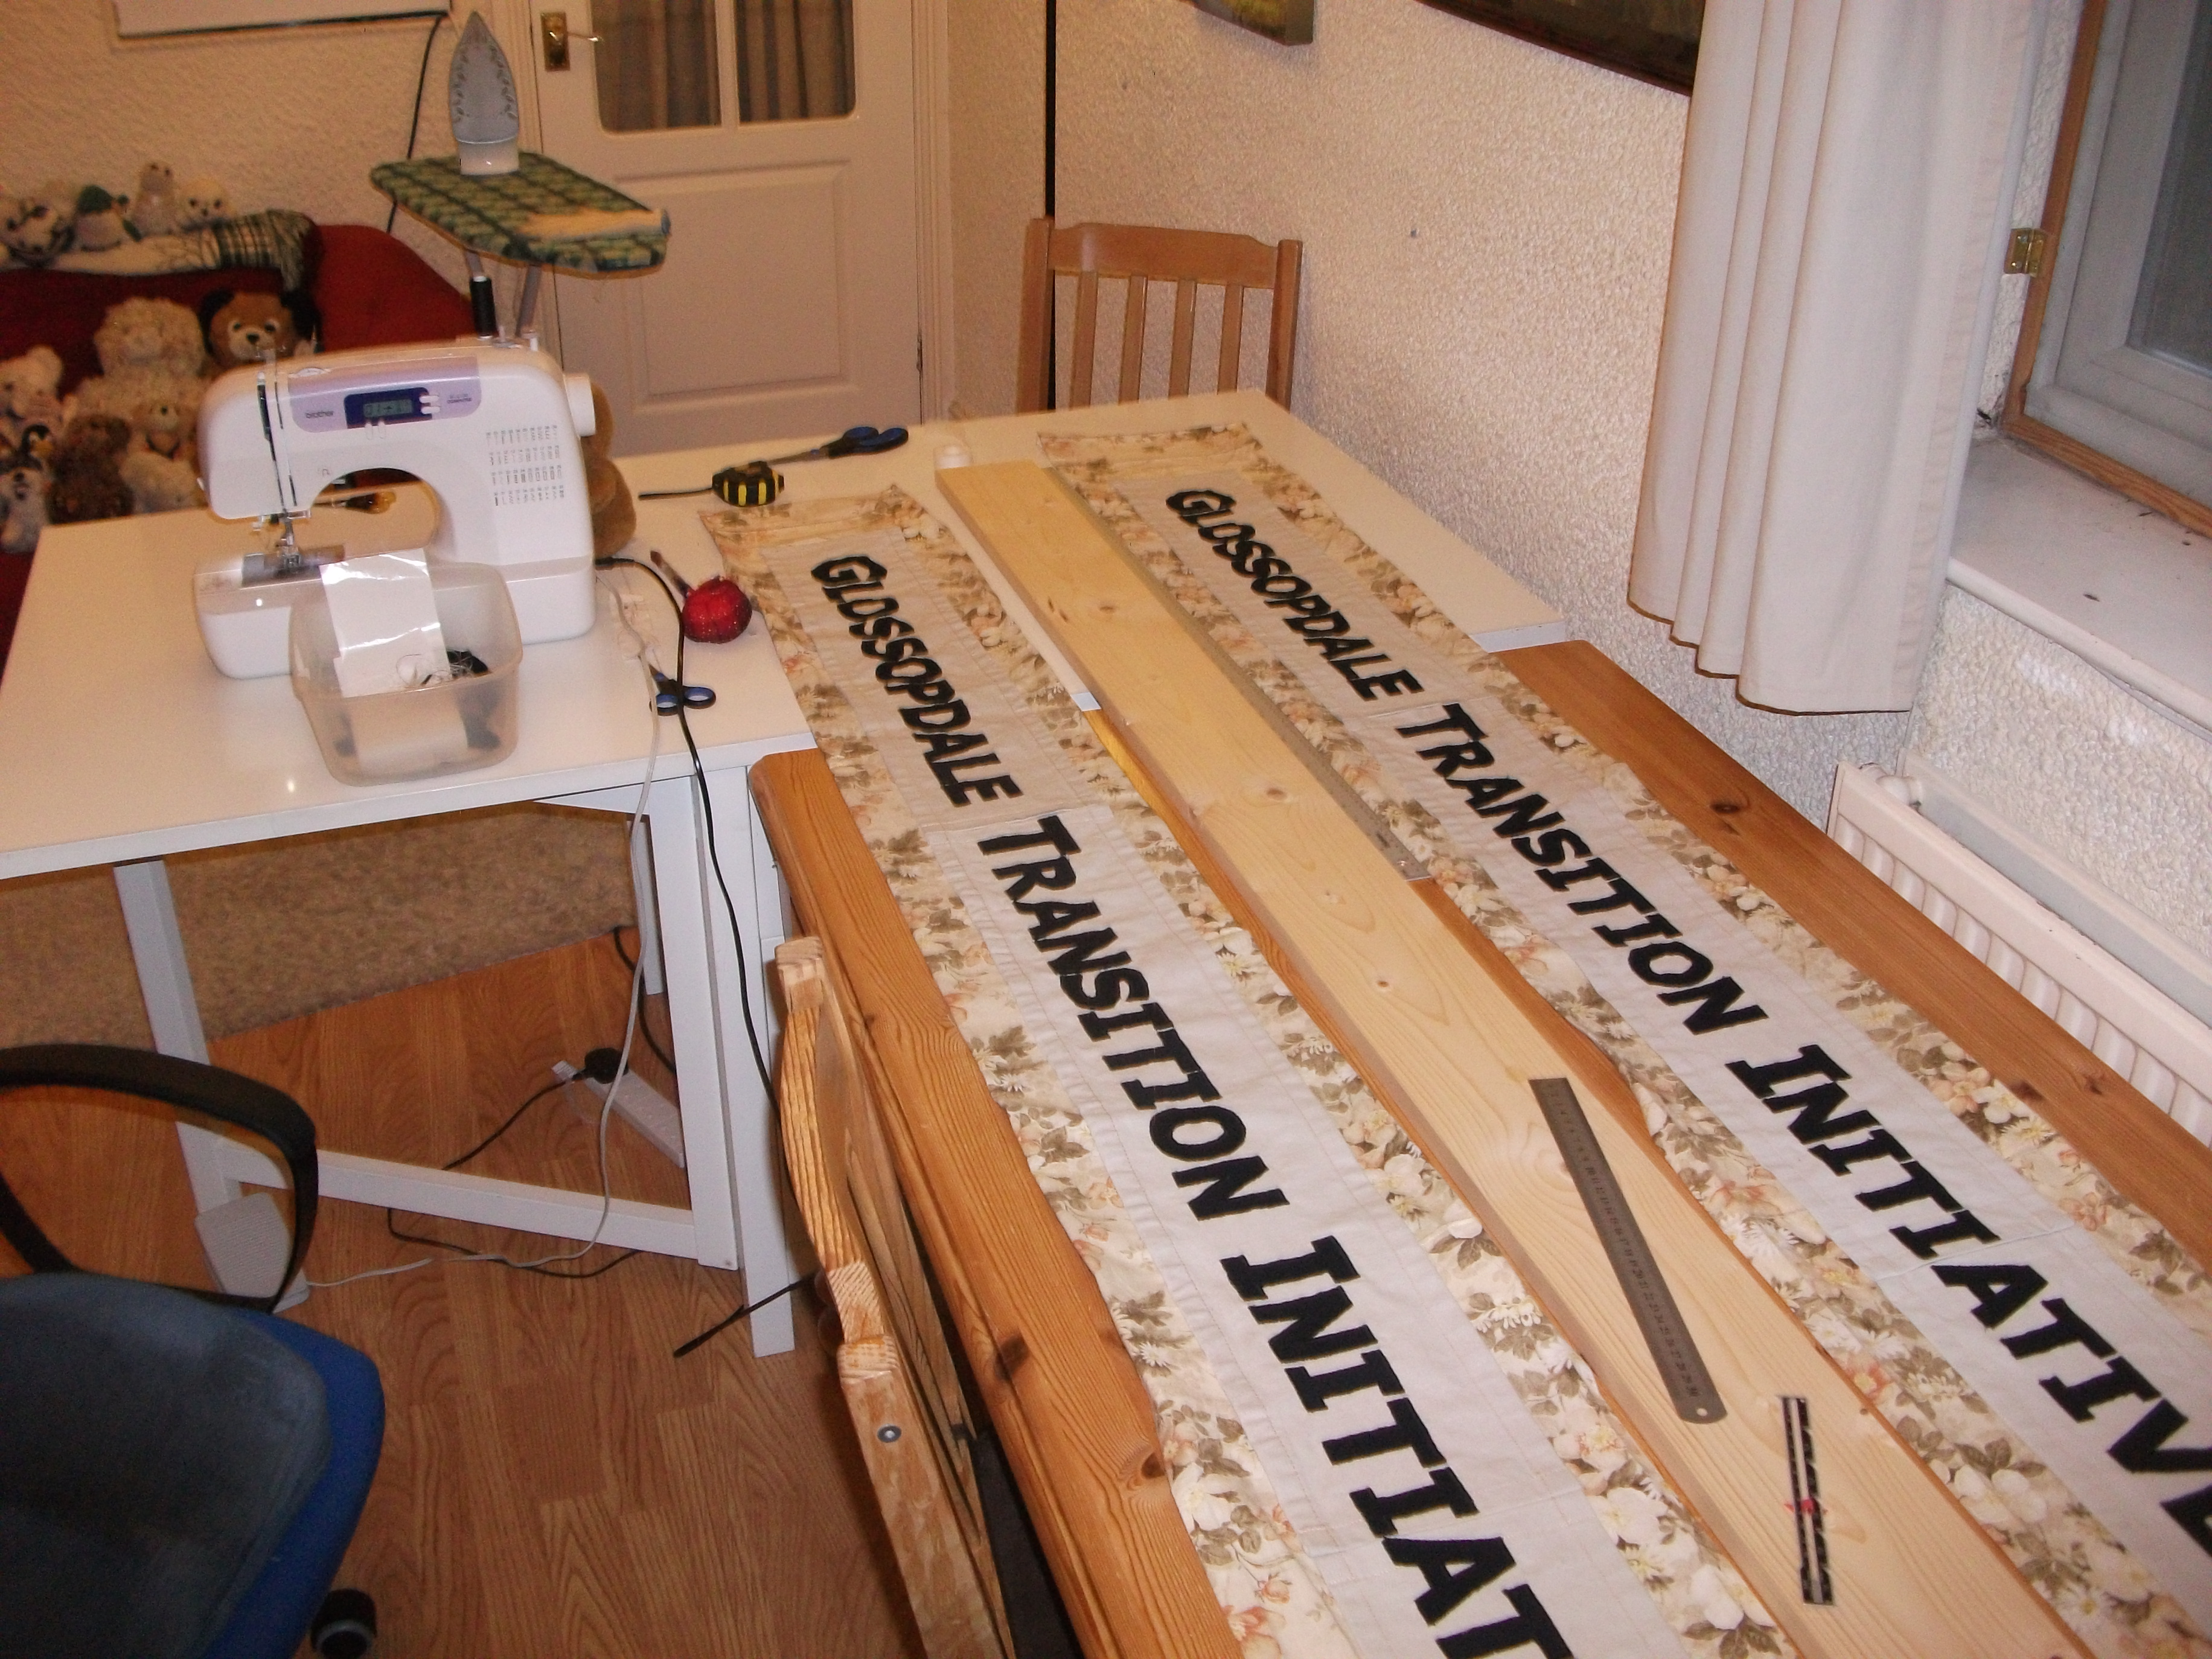
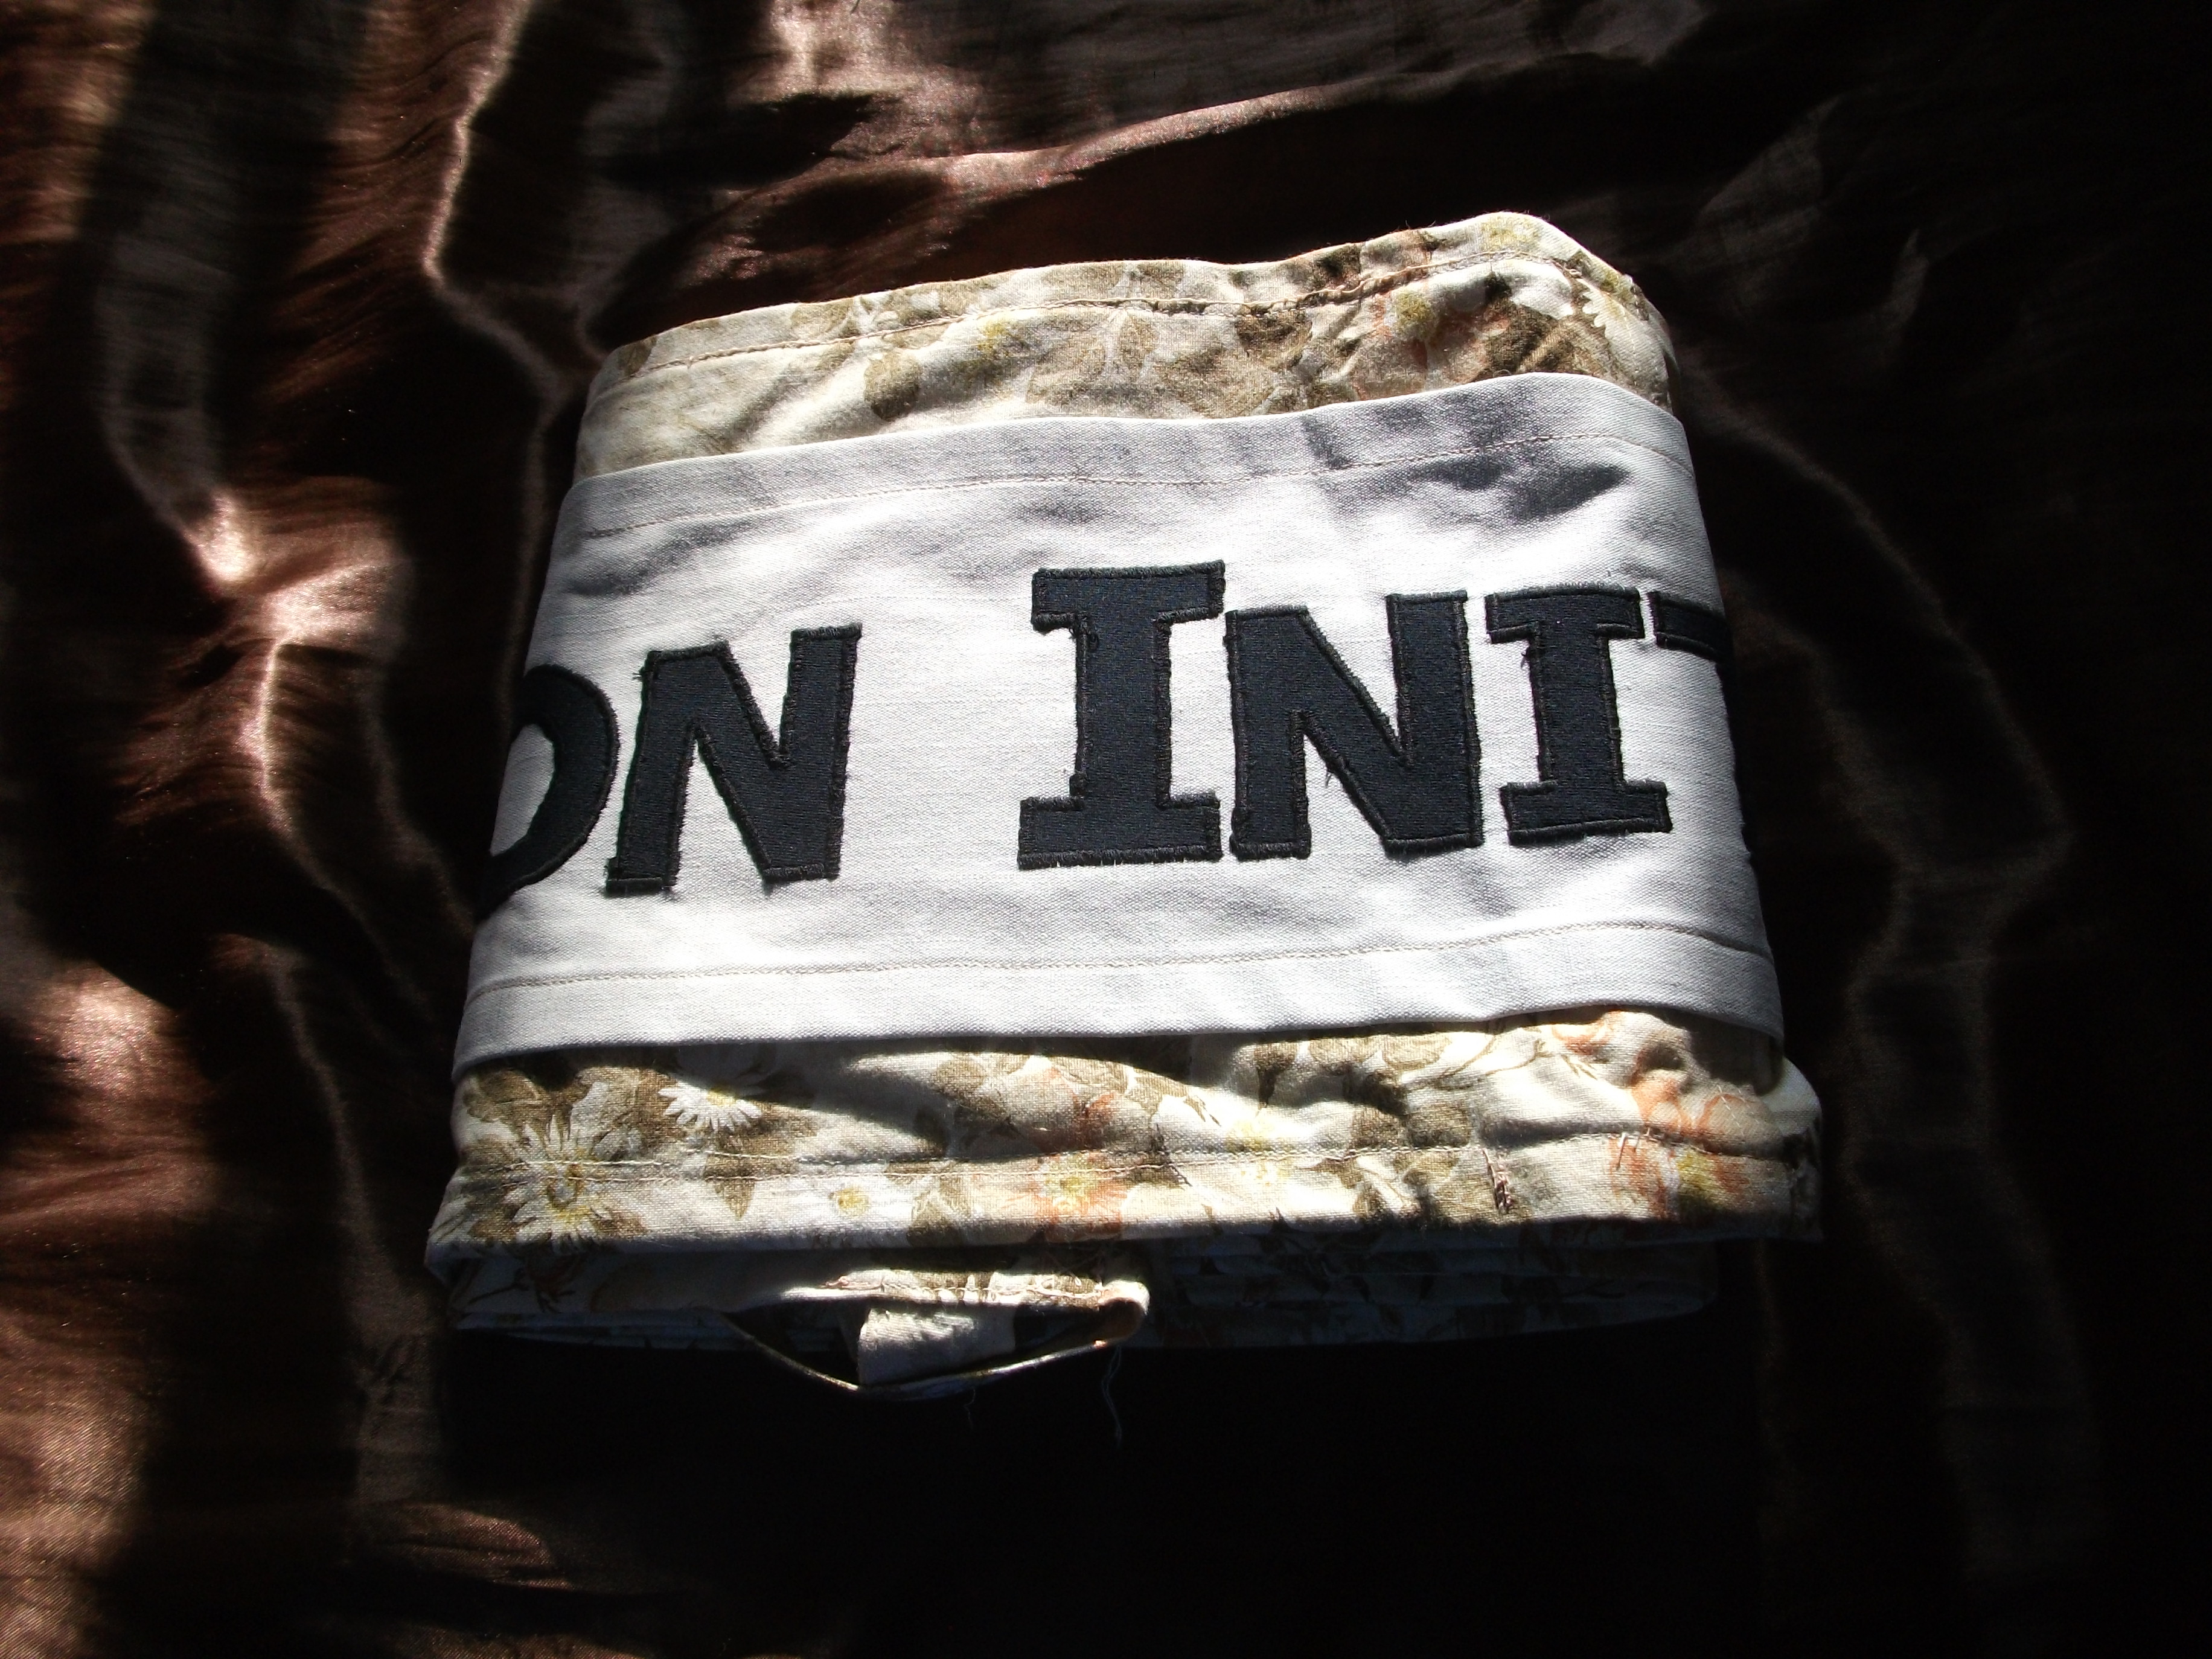
It’s starting to look like a banner! After two days of the most mind-numbing work I’ve done since I worked on a factory line, the letters are all sewn on, wewt! The gray panels are sewn onto the floral backing, but I haven’t hemmed up the floral fabric yet – I still need to arrange ties and weights and pockets.
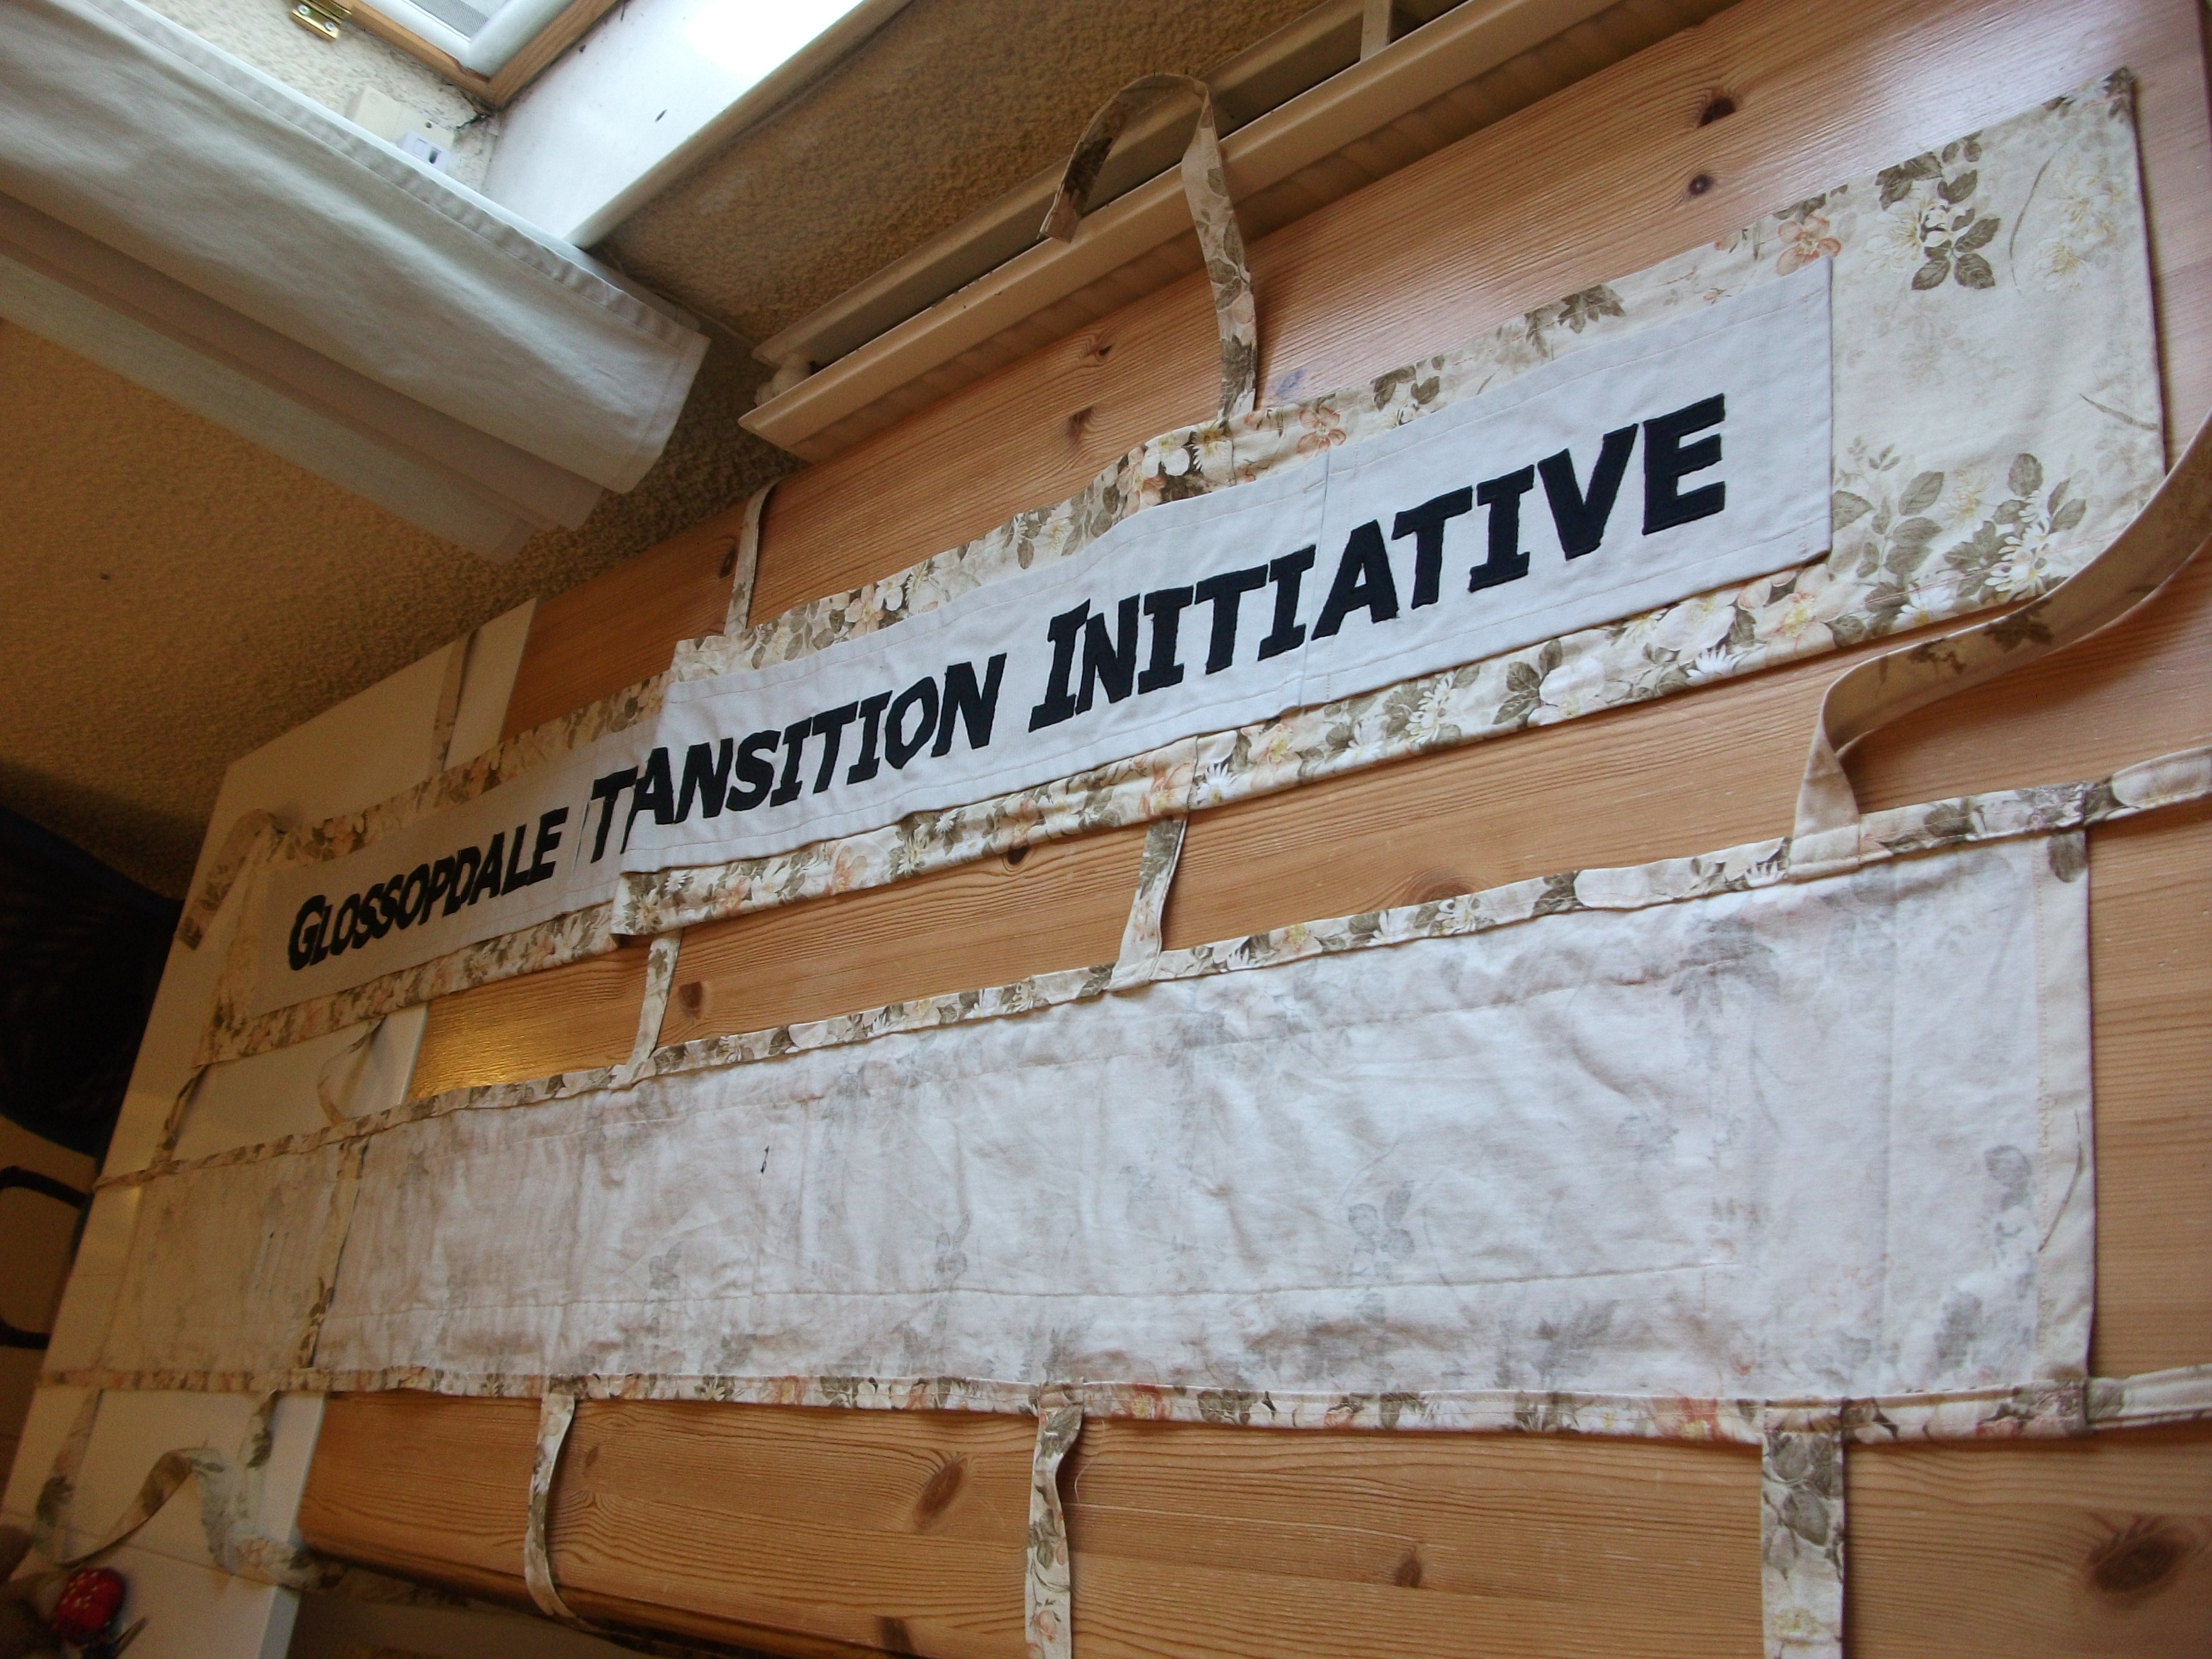
Ties are in and hems are sewn!
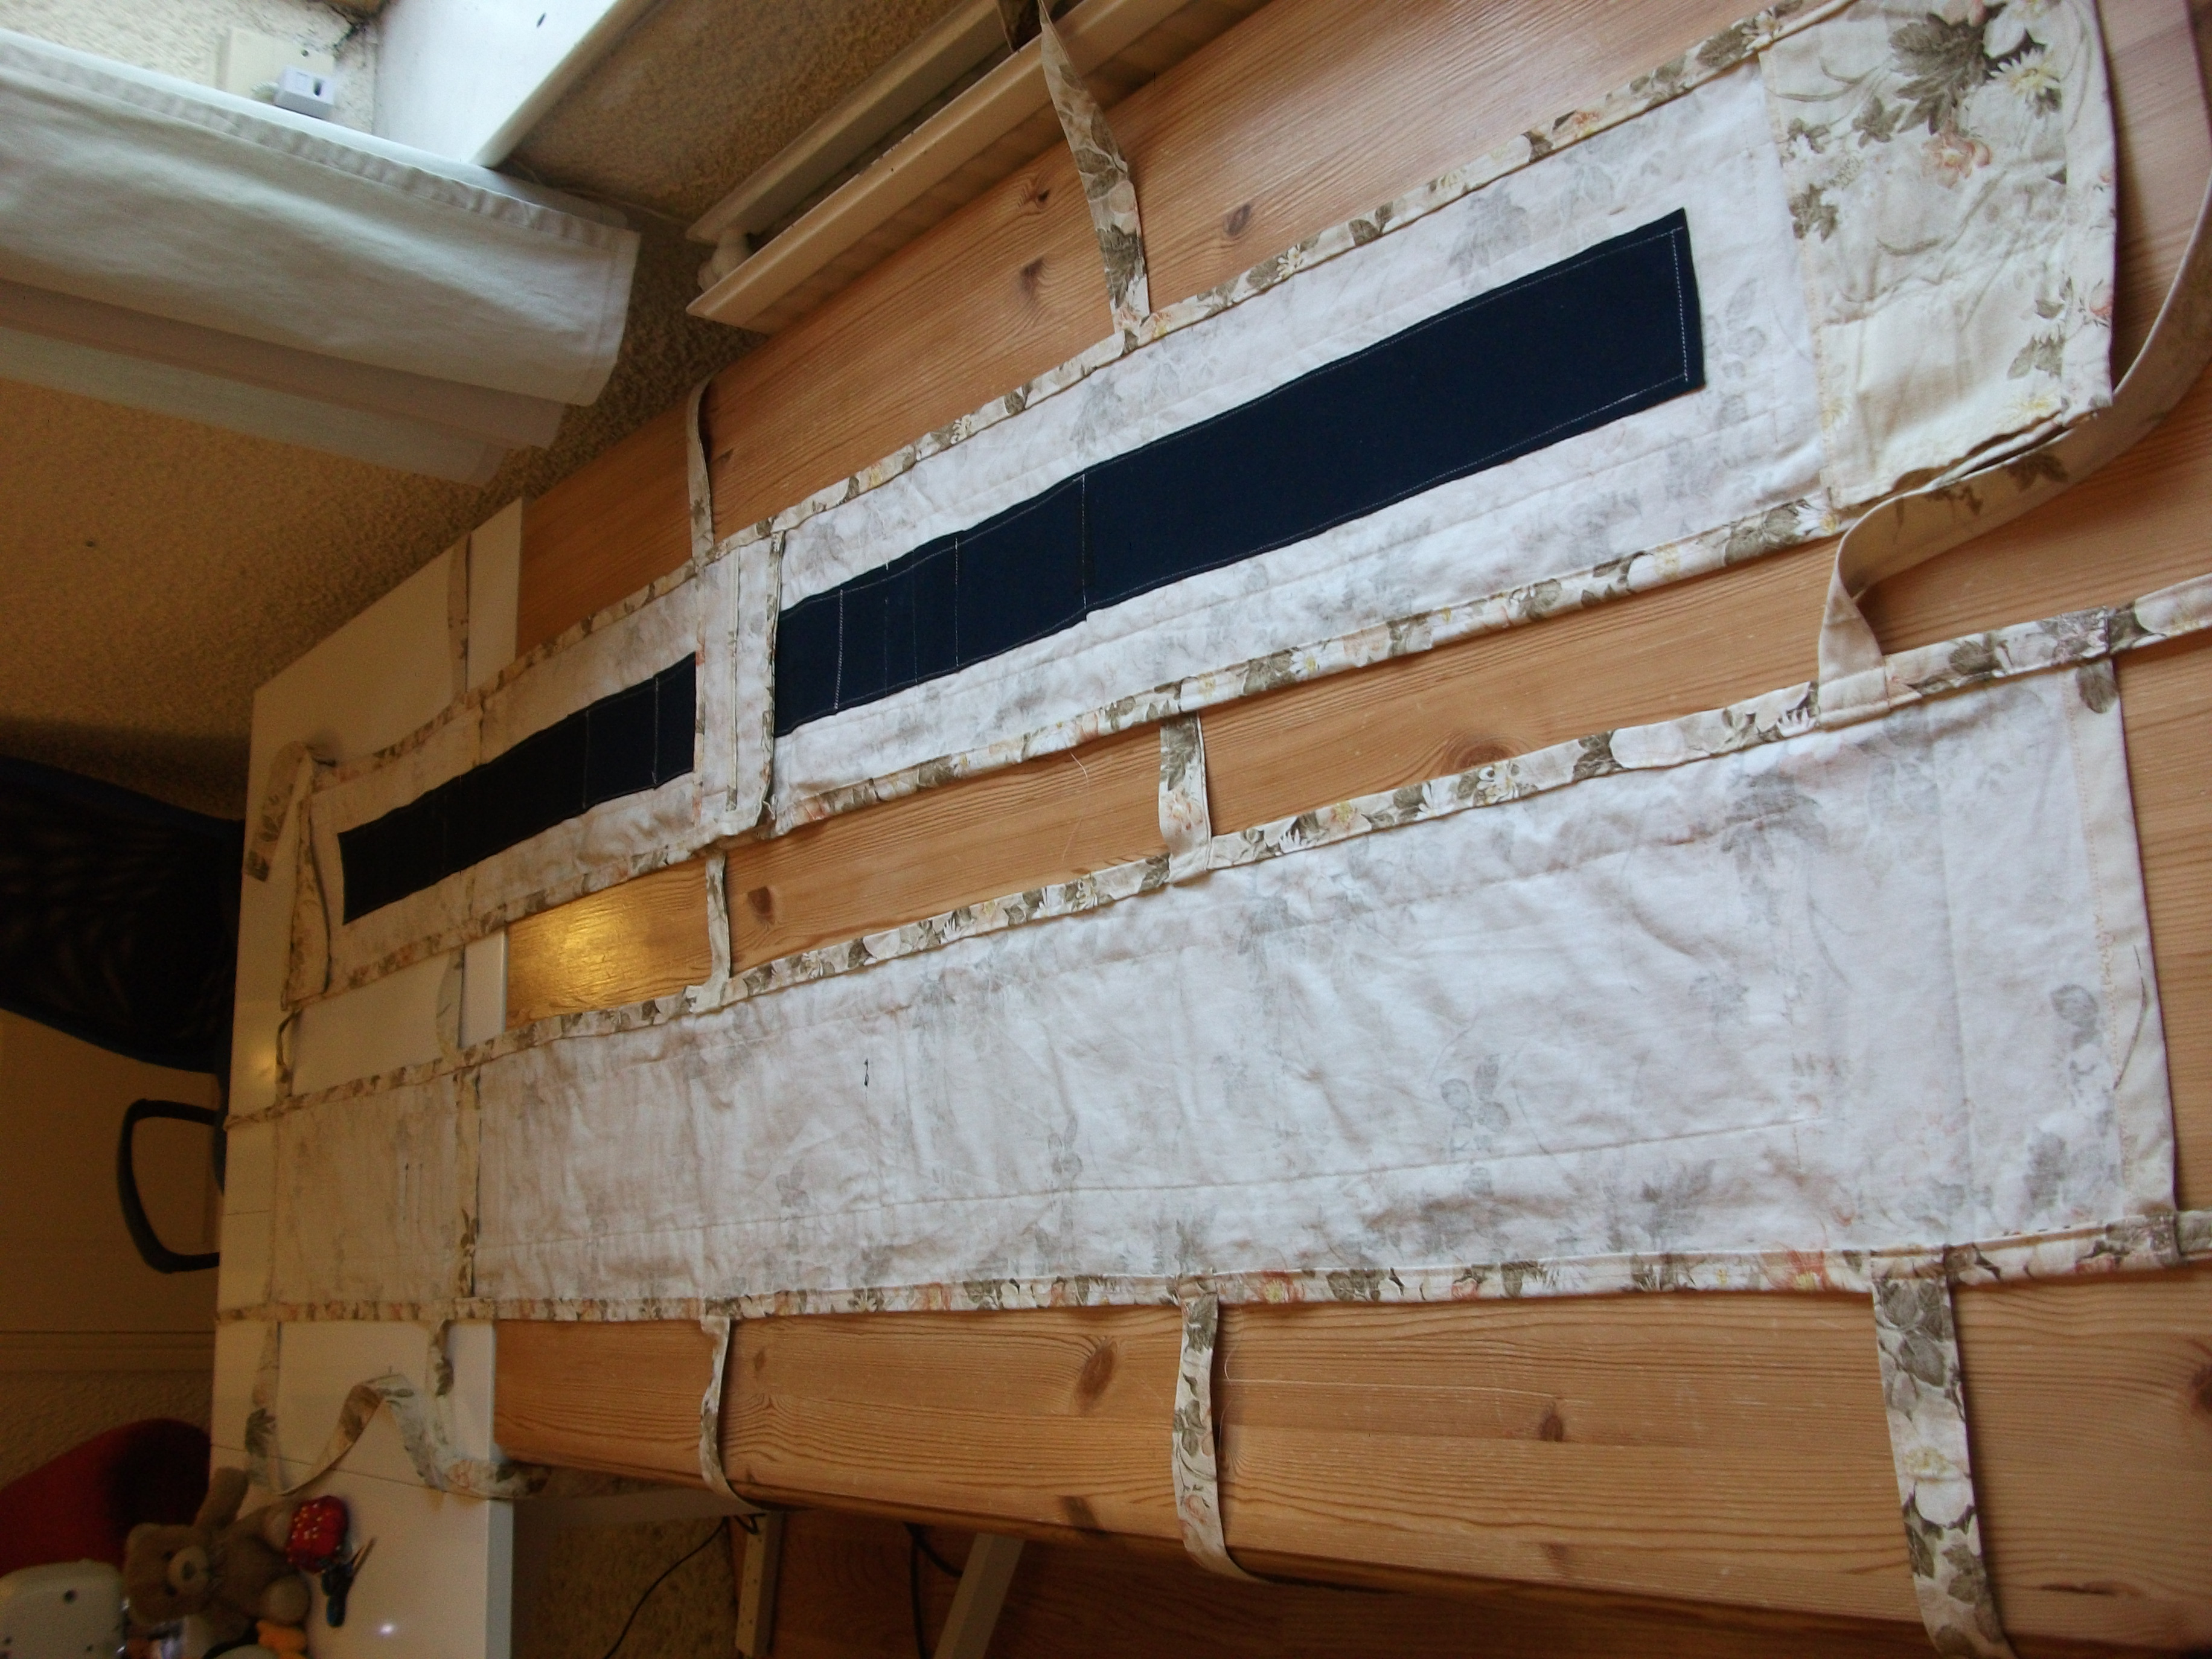
I was worried about light showing through the banner from the back in certain circumstances and thus seeing the letters going both ways, as you do when you hold a sheet of paper with words on it up to the light. Putting a layer of the same black t-shirt fabric I used for the letters between the two sets of lettering seems to have taken care of that nicely. I made sure to put that on first, though – I sewed that onto the back of that piece of fabric before sewing the lettering panels onto the front.
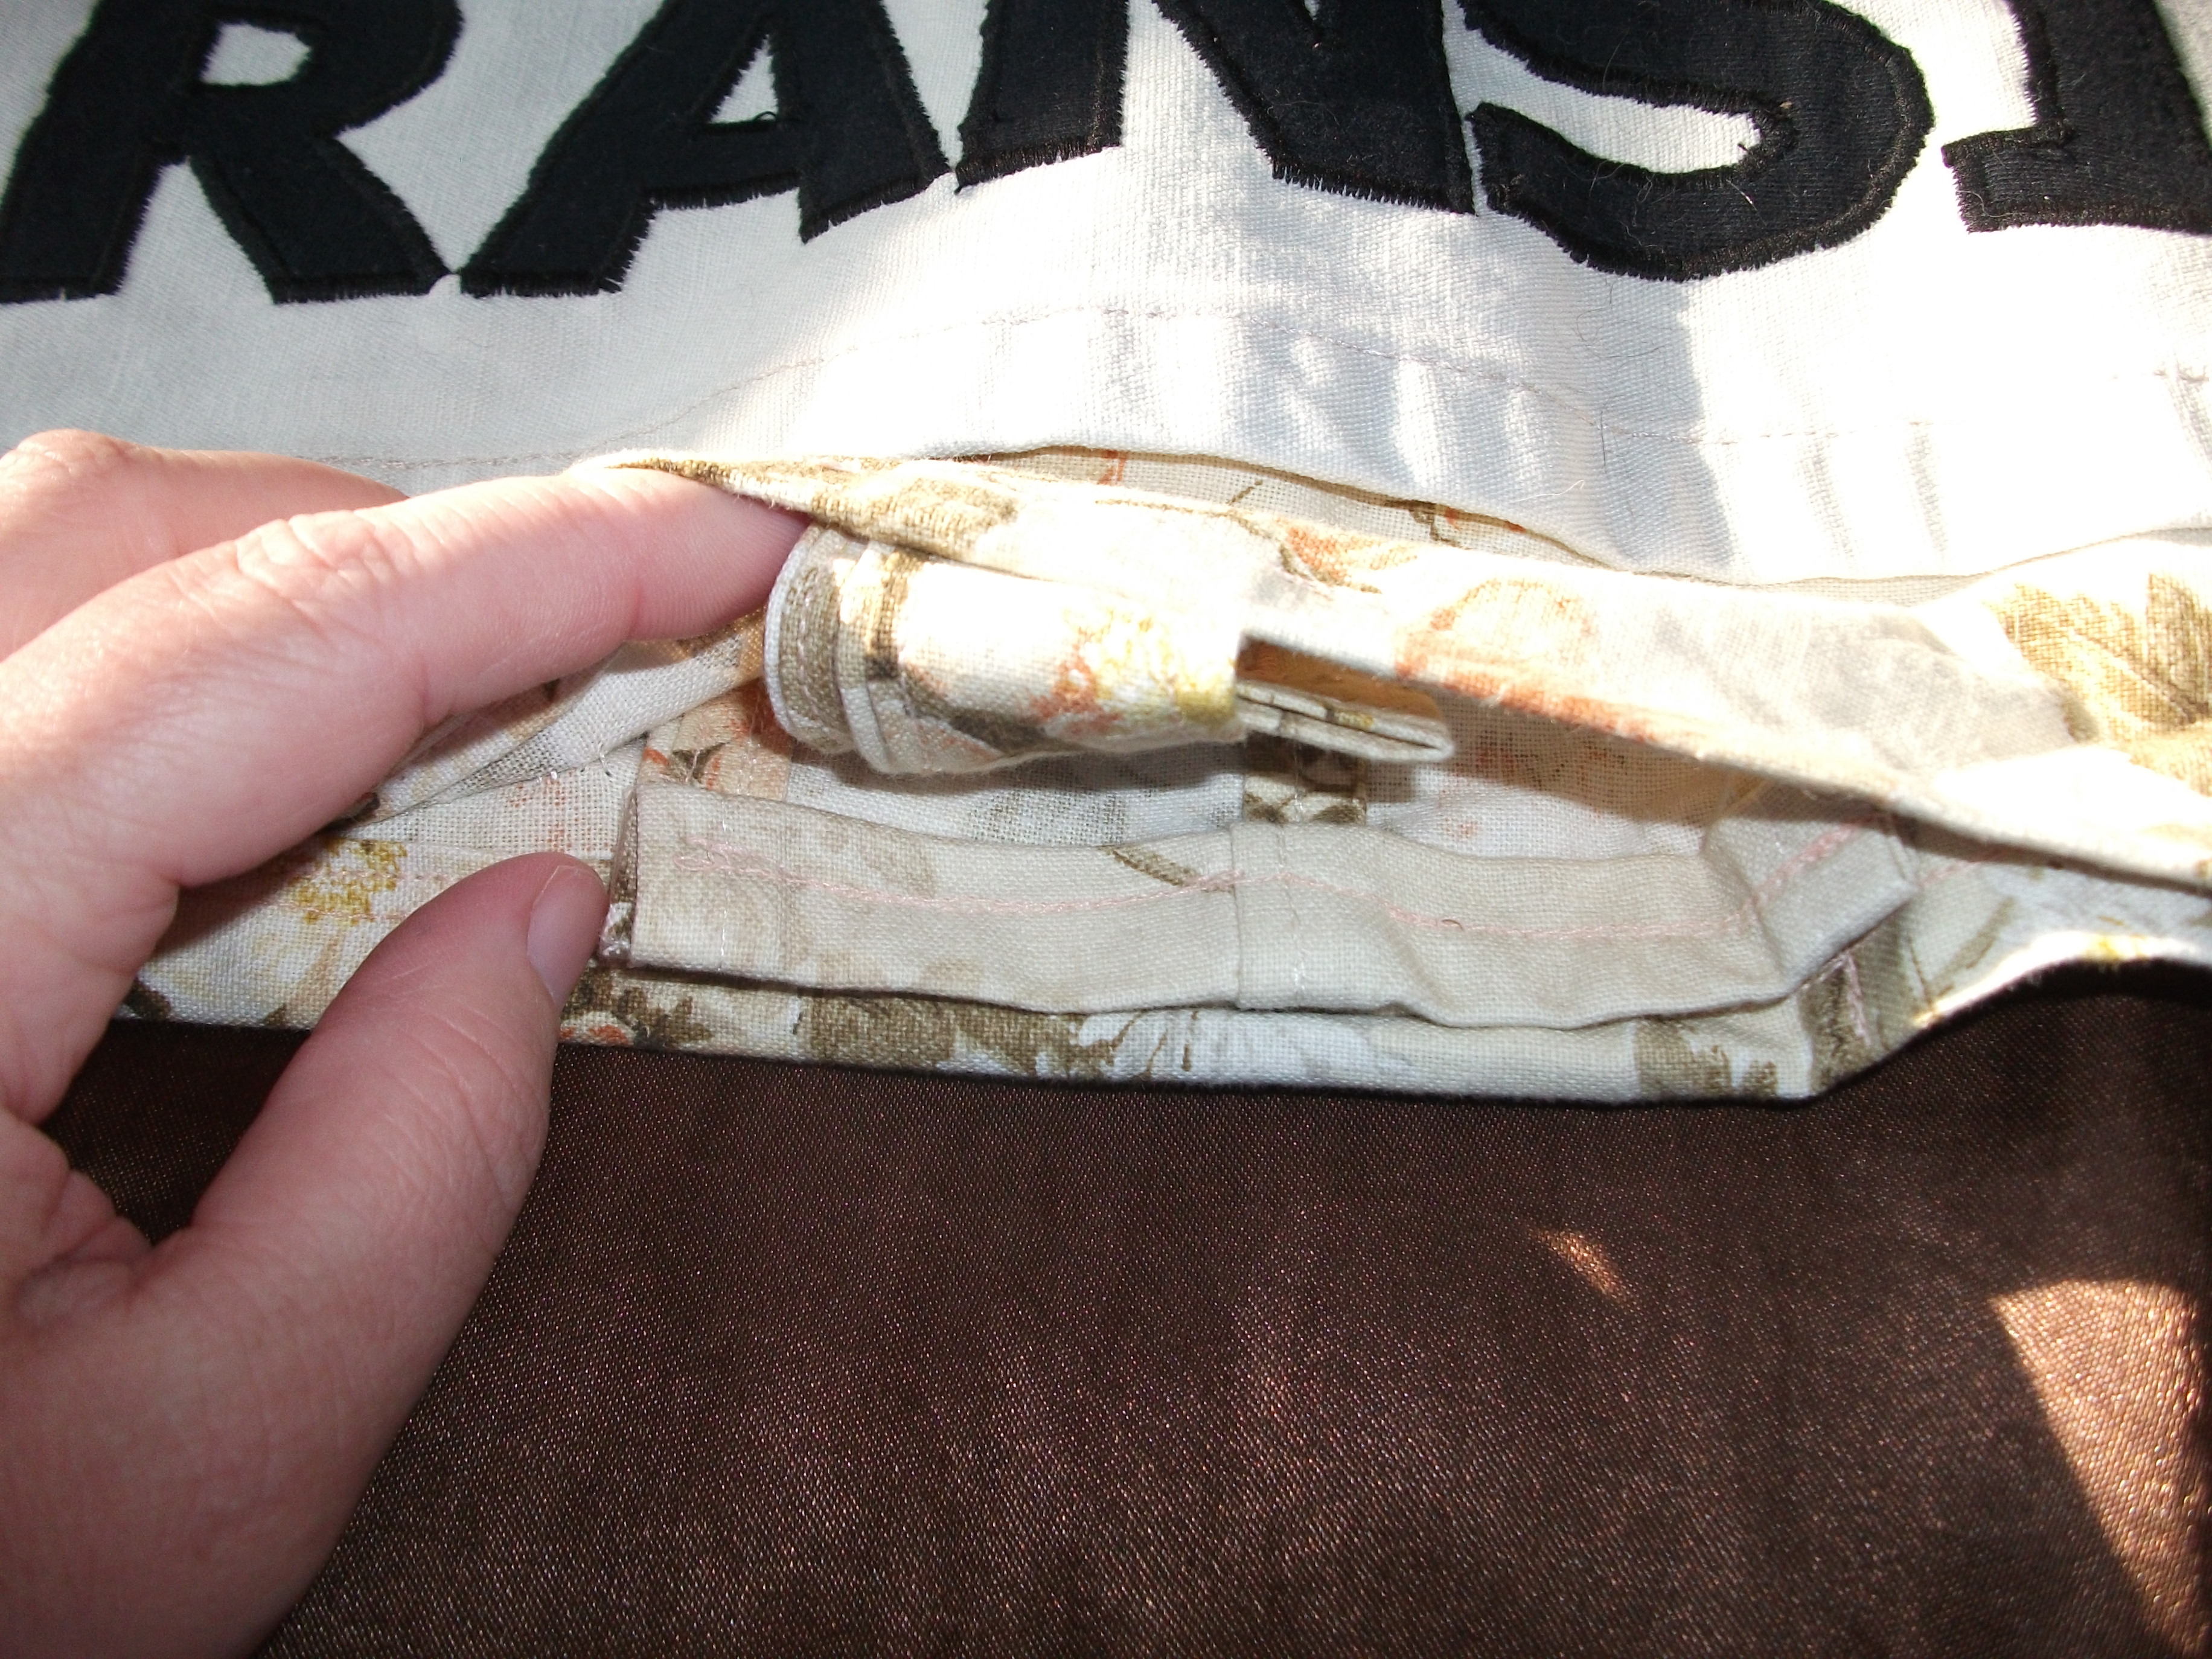
On the side with the black backing, you can also see the pockets I sewed for the poles to go into, and the bulge along the bottom seam (which is closest to the other half of the banner in this picture) is where the weights are in the bottom hem.
Those weights were originally 1m long (3′) steel poles vaguely around 2mm (1/16″) in diameter. Chris had gotten them for another project, but never made that work so had done something different there. He was easily able to cut them down for me (so they’re in 20cm (8″) lengths), so I sewed them in. In addition to the horizontal bottom hem, I sewed vertically between the weights to keep them put where I wanted them, with some clearance to either side of the vertical seams, plus about 5cm (2″) empty space between weight pockets. The empty space was so that it’d be easier to fold it up – I knew a fabric banner would need some height to its fold, unlike, say, a paper banner. This actually worked out really well.
The two sides are sewn together! It’s a banner! Woohoo!
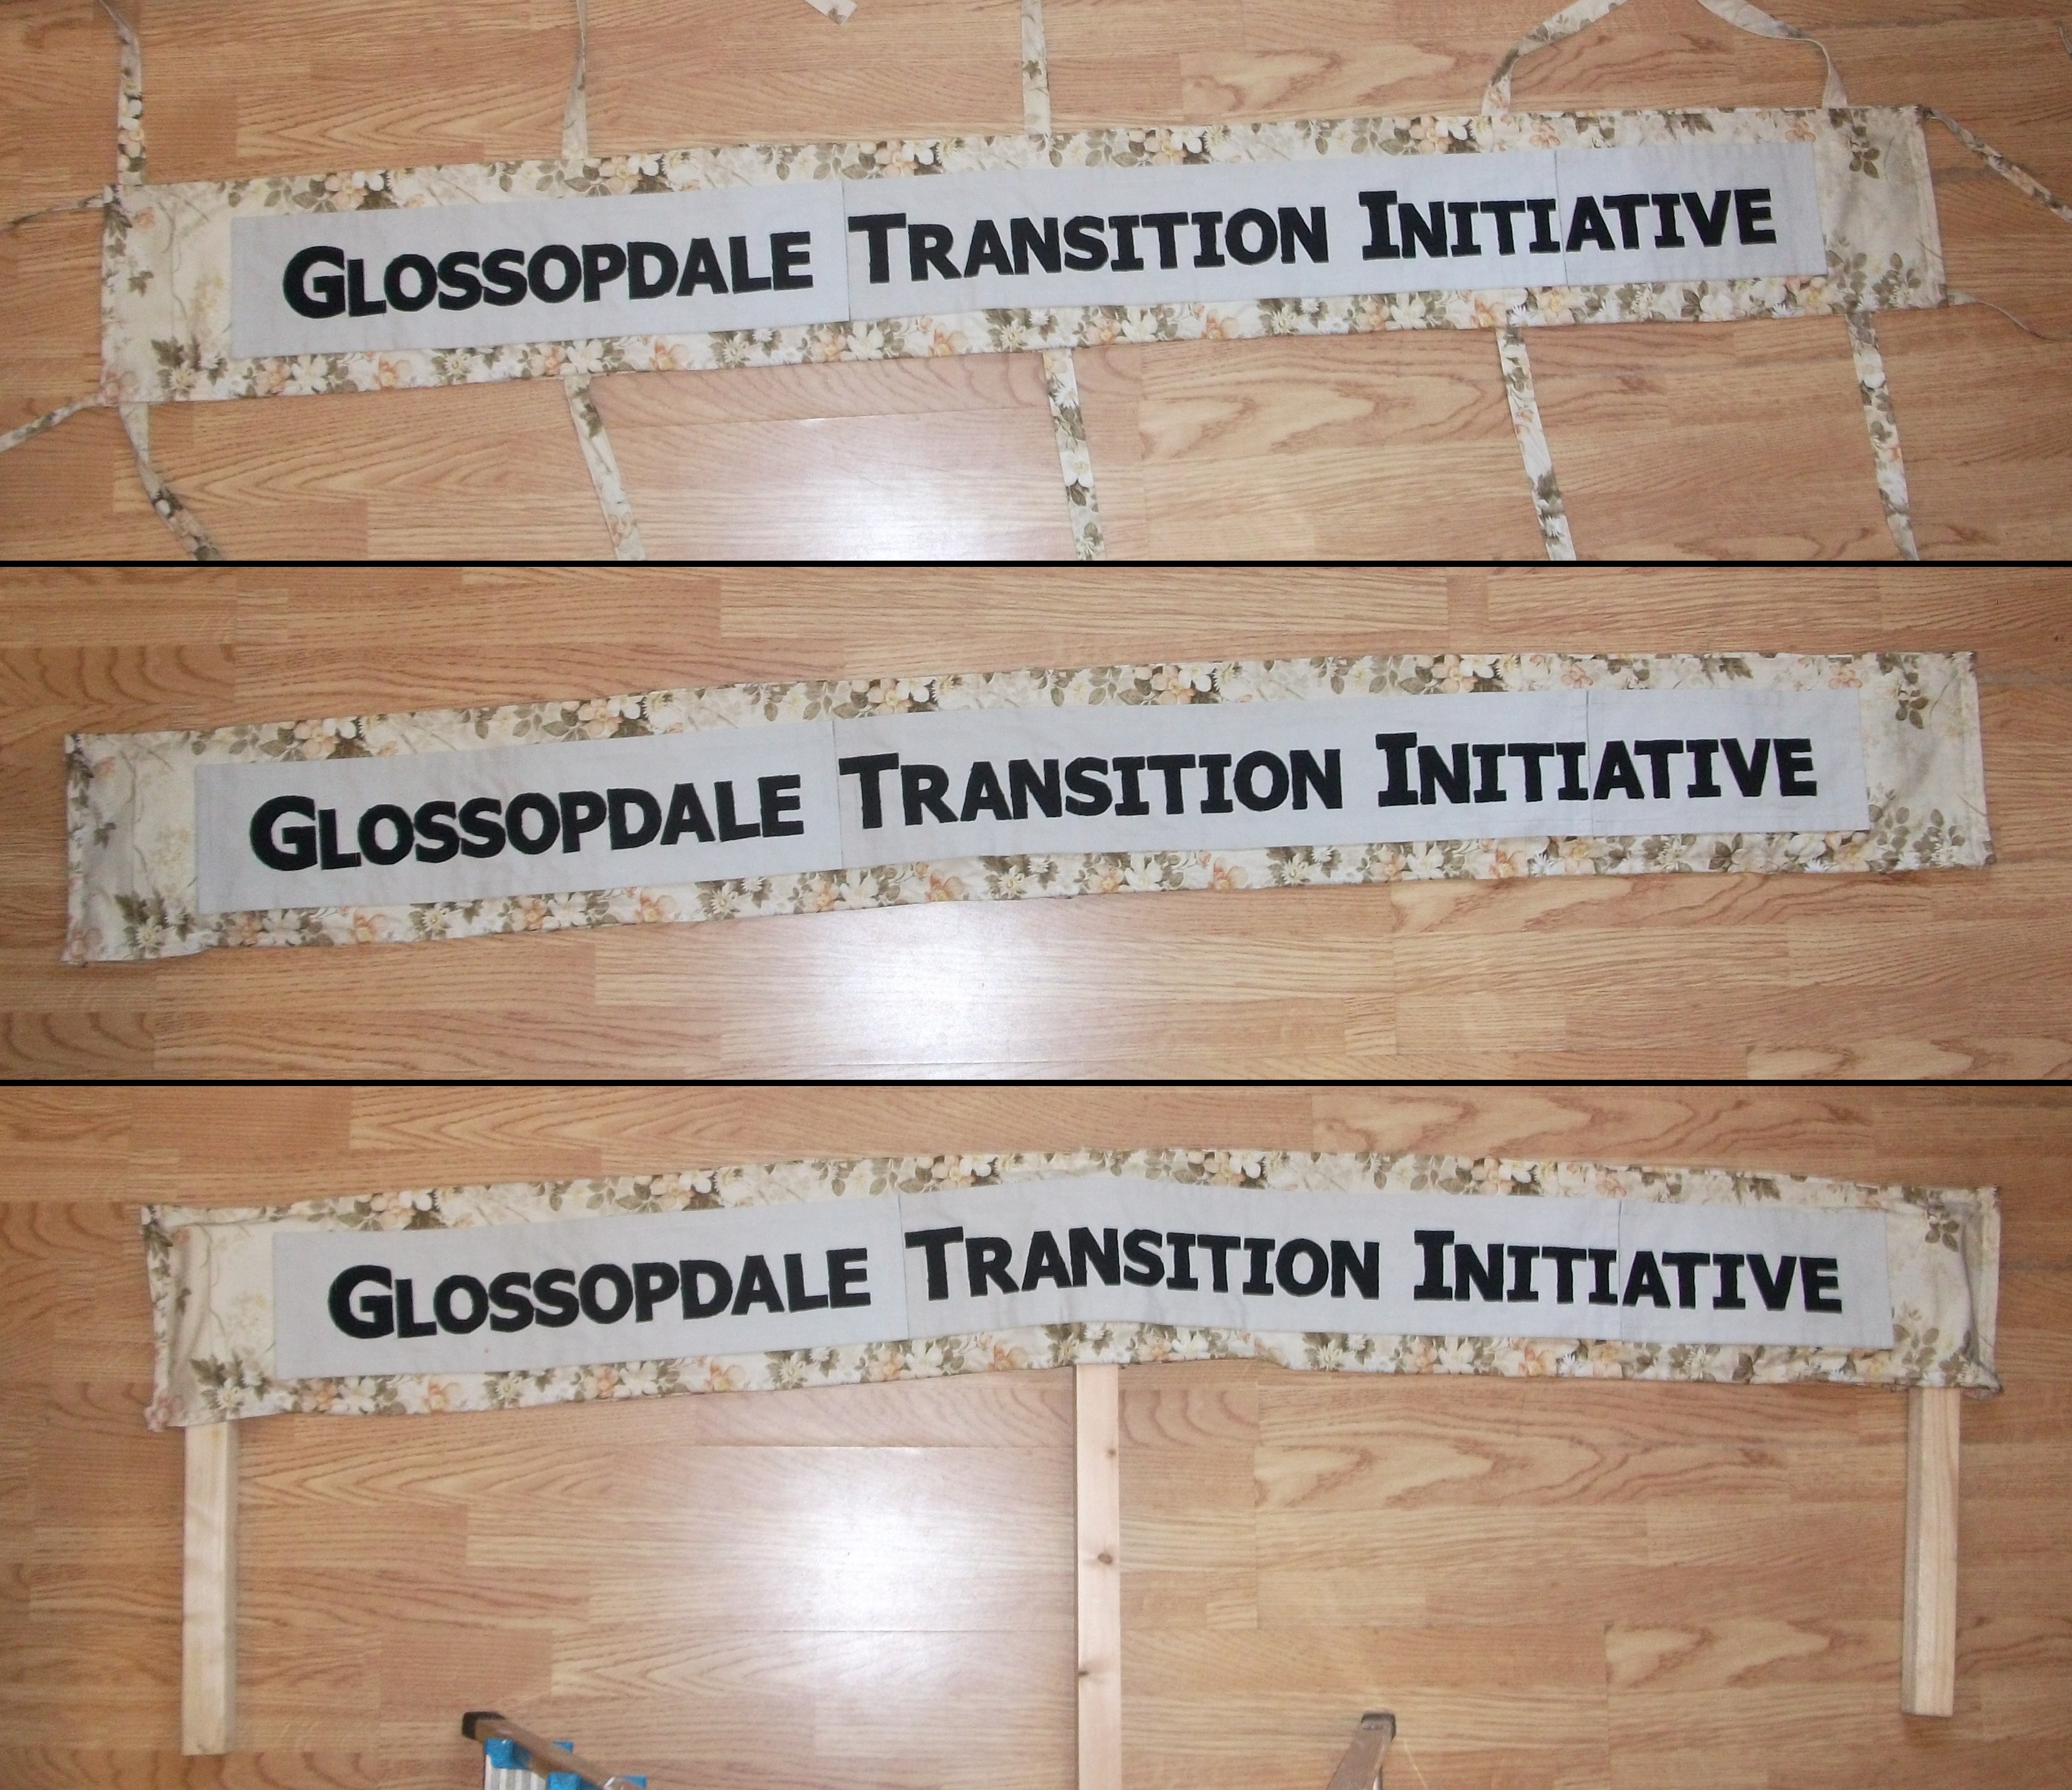
The finished product! The top view shows it with the ties out (the ties all have buttonholes sewn in the ends as well, to tie more string through in case they should ever come up short); the middle view shows it with all the ties tucked in; the bottom view shows it with posts in it that could be used to carry it in a procession or stick it in the ground.
The stitching isn’t perfect if you look at it up close, but then, you’re not meant to.

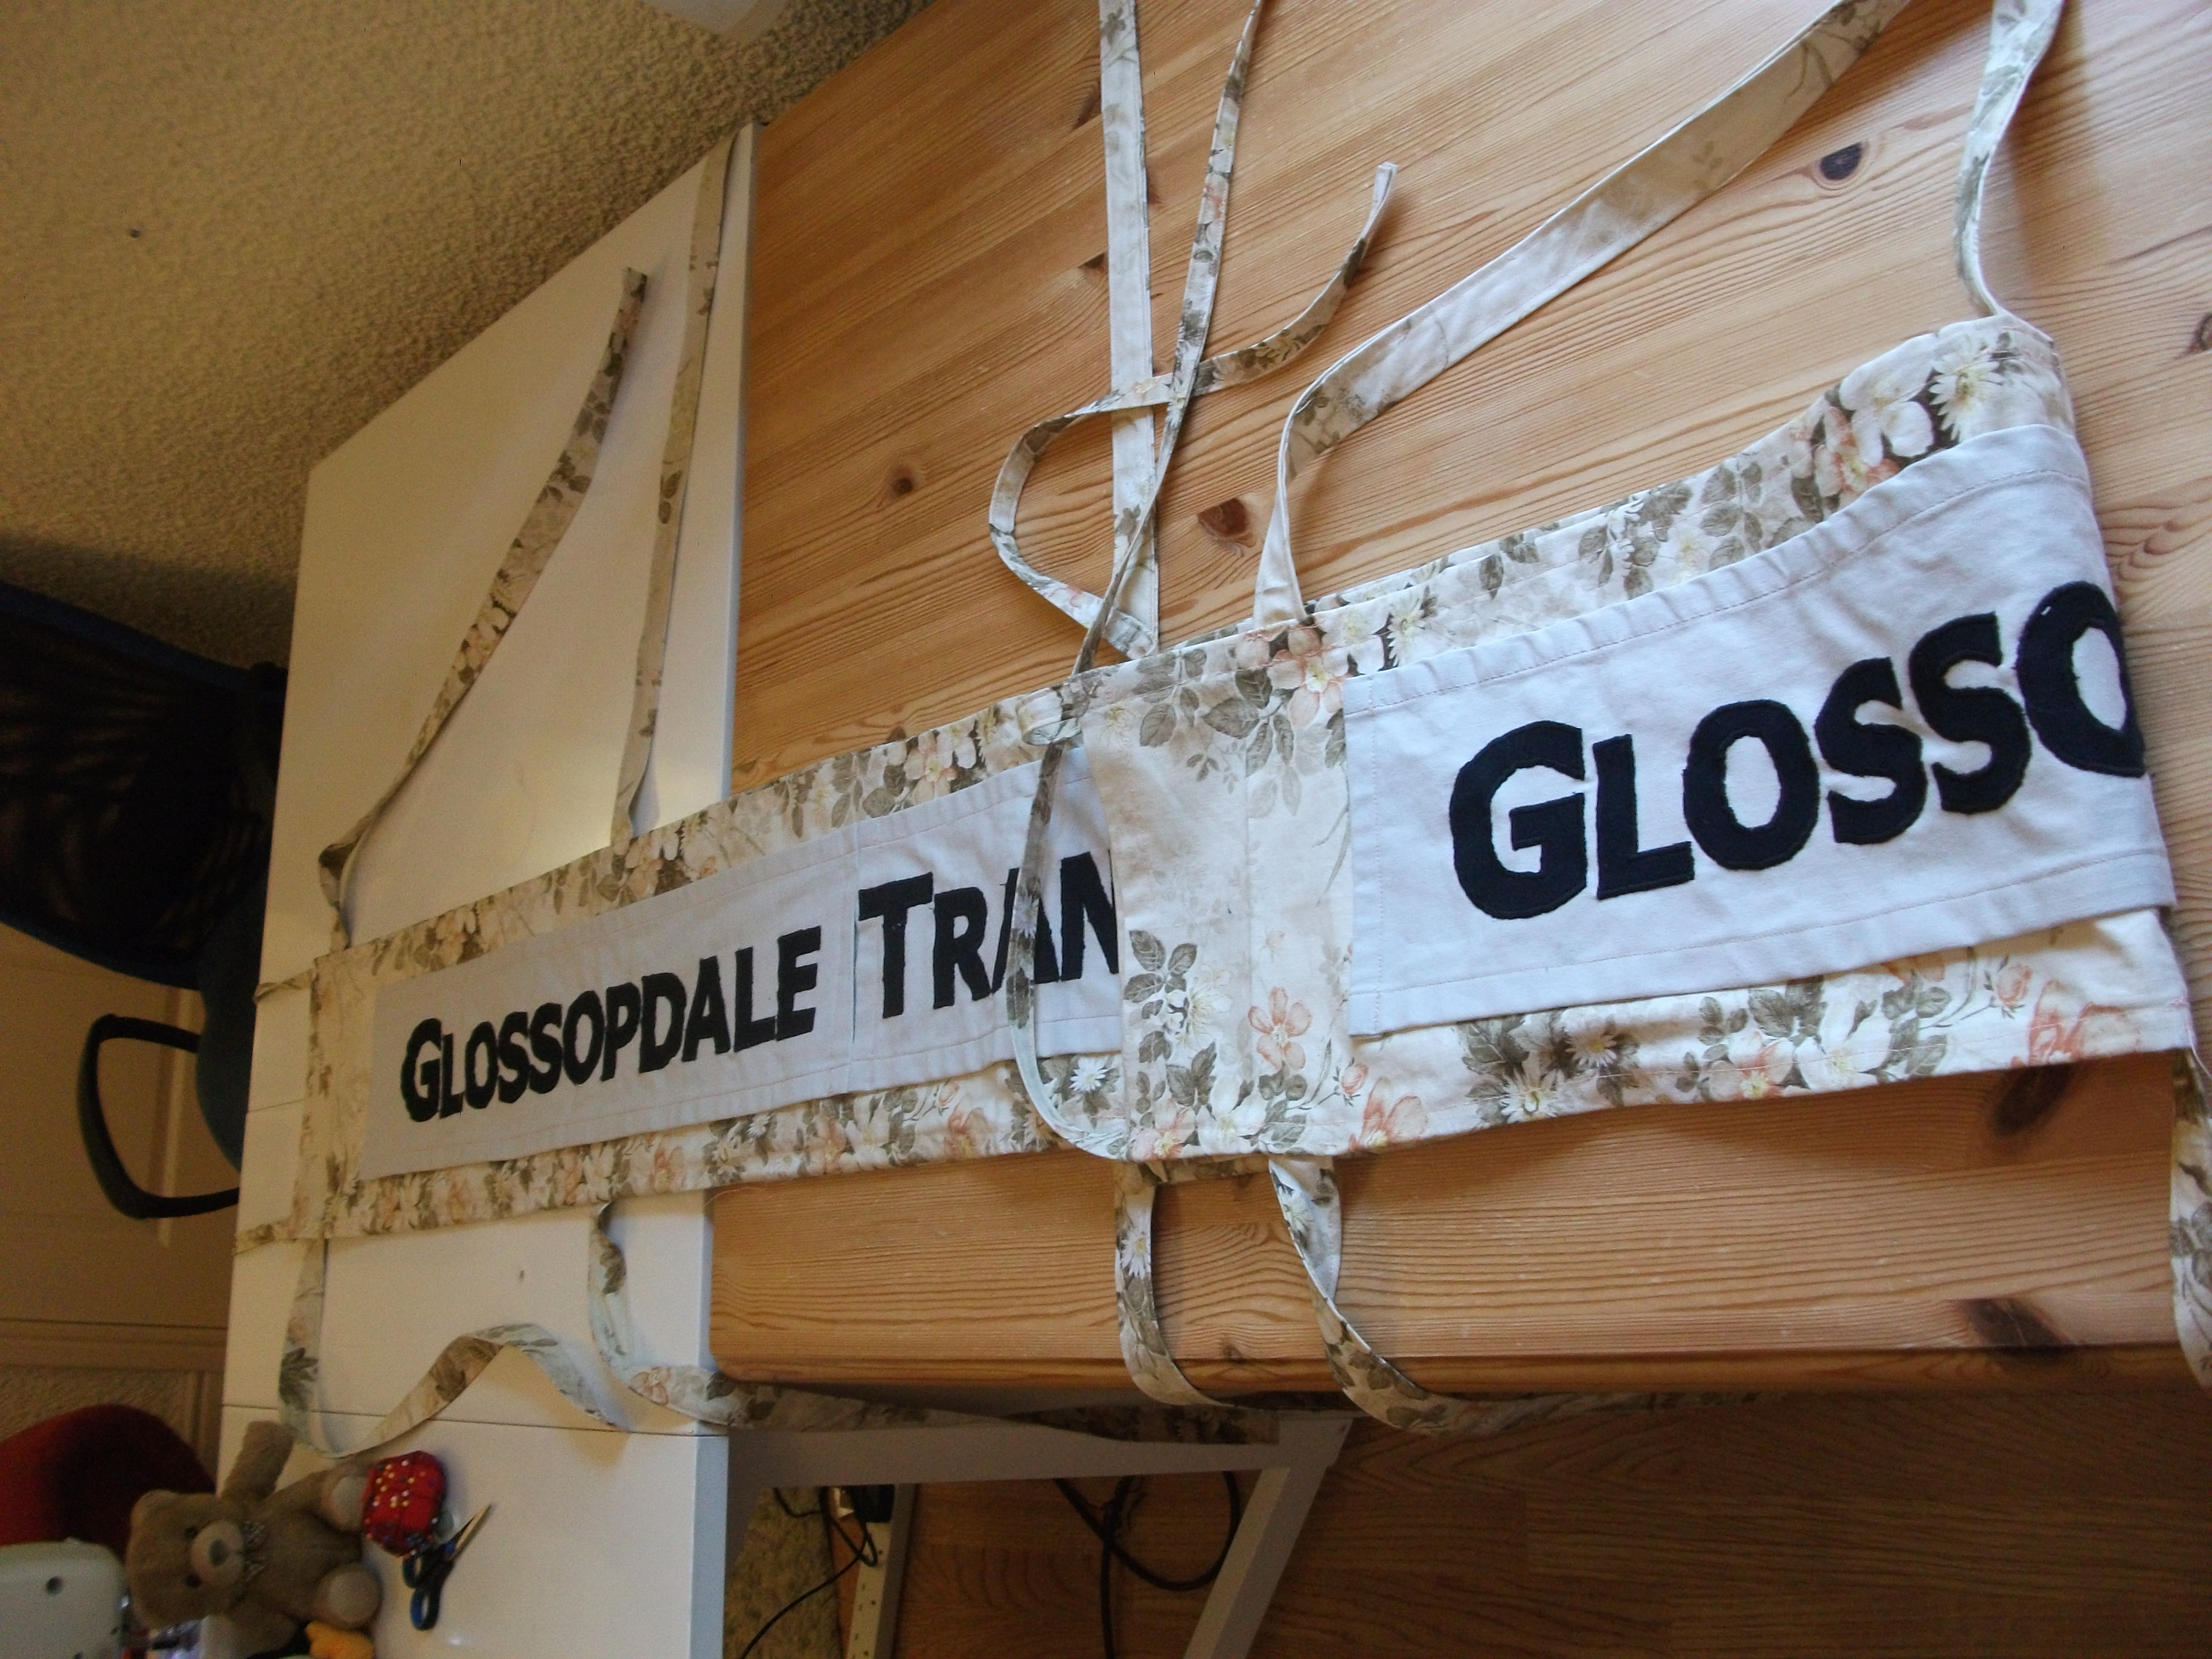
My lower thread tension kept messing up, so it’s not quite right over on the right-hand side of this picture. It’s also very messy on the left. I’m not terribly keen on the pink, to be honest, but it was strong thread that I found pretty cheap at my local craft store, and from a distance it blends well enough. I thought having good, strong thread was more important here than a perfect color match.
I didn’t actually know about the existence of this “strong thread” until I was in the midst of this project. May had taught us about better and worse thread (and how to tell the difference), so I knew the thread that came with my machine wasn’t brilliant. When my thread kept snapping when I first started practicing sewing those letters on, I got fed up and hiked down to the craft store to demand stronger thread … whereupon I discovered some thread is actually called “strong thread” on the label. I got one black for the letters and one pink to sew in the ties and brought them home. The black sewed the edges of the letters like a dream, but I used it all up after four letters. Extrapolating, I figured out this would suddenly become a very expensive project if I carried on with that thread. I went slower with my cheap black thread and it was fine in the end. I had enough of the pink to make the ties, sew them in, and do all the edge sewing of the entire banner, so that’s good.
See? It’s a bit better from a bit of a distance.

I switched to black thread when I was sewing the lettering panels on and had to sew over the letters. I didn’t expect such a perfect color match; I’m delighted – it’s damn near invisible!
 |
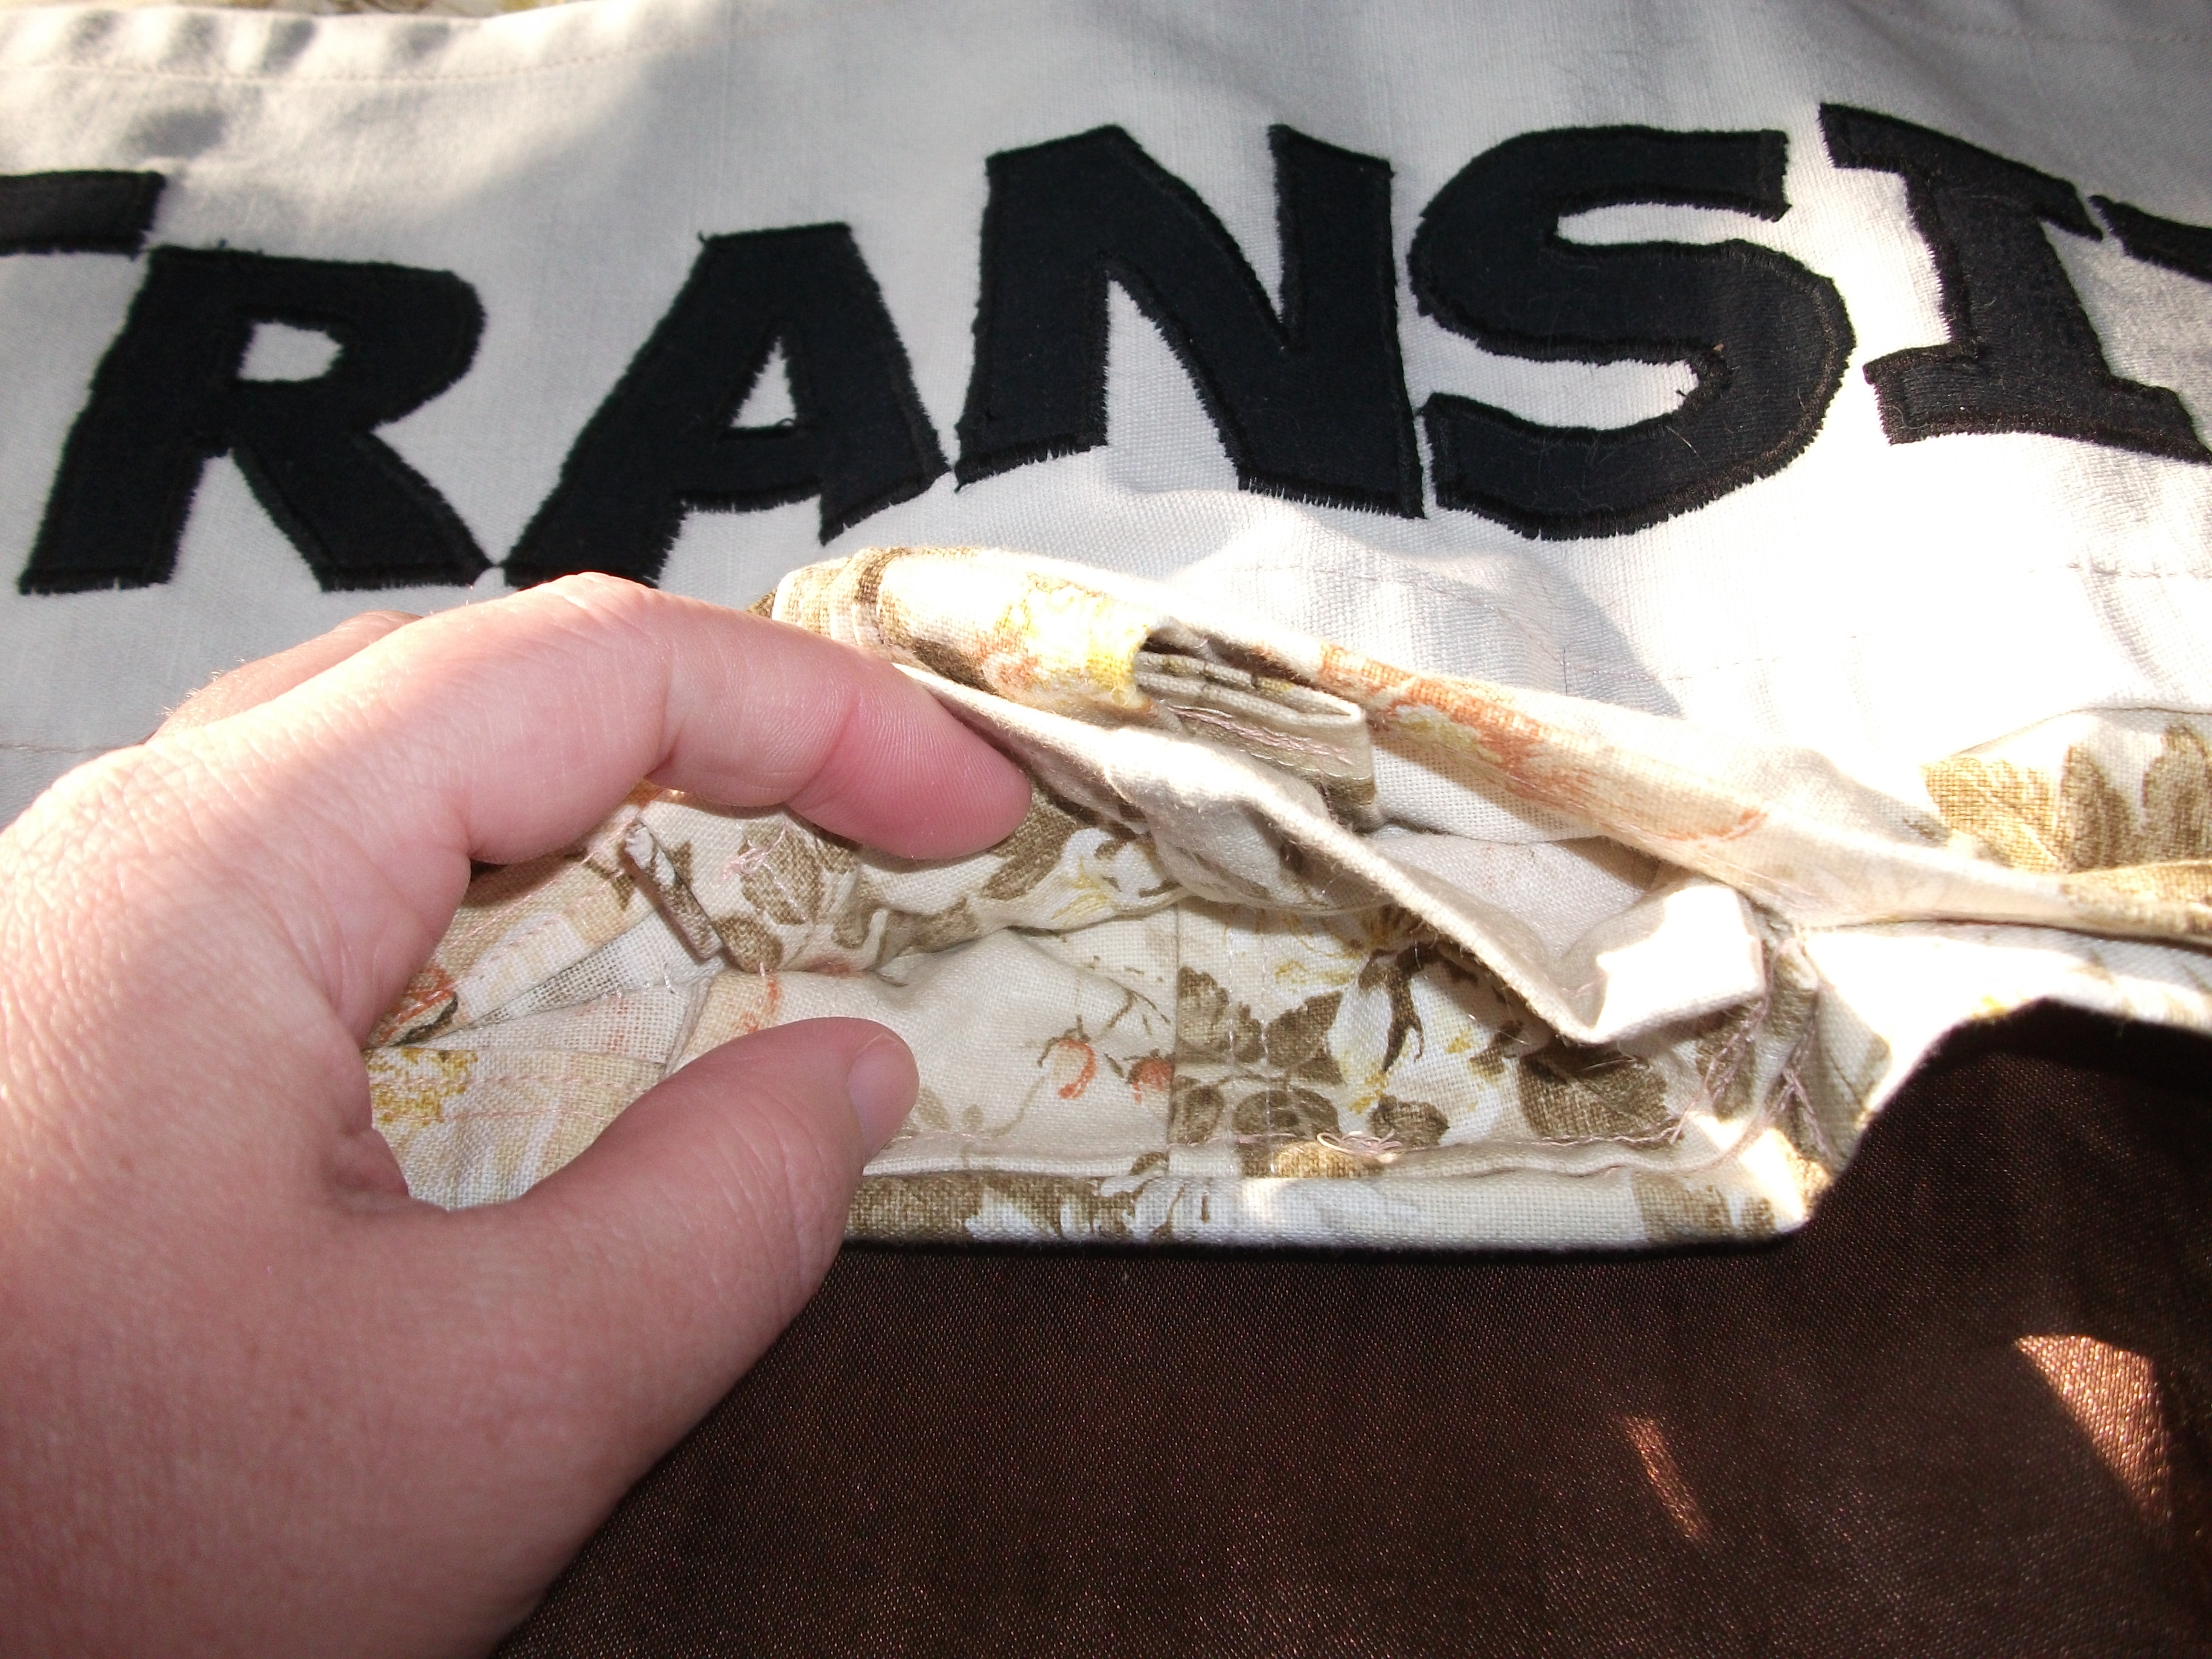 |
Now that it’s all sewn together, this is what the middle of the bottom looks like. On the left: lift up the top floral backing and you find the area to tuck the tie into. On the right: the pocket the post slides into, with the tie tucked in outside the pocket. You can see the weight just under my thumb there. I was a bit concerned that would cause trouble with putting a post in this pocket, but it doesn’t, phew.

The banner in action! This is at our first event, Glossop Carnival, 6 July 2013. You can also see the larger of the two display boards that Chris made off to the right.
 |
 |
The hands-on activity we had at this stand wass braiding strips of t-shirts together to then wind (in a circle or a rectangle or whatever shape you please) it up and stitch the back of it to make a mat – a coaster, a placemat, a bathmat, etc. I’d made a long braid and, with nothing better to do with it just then, used it to add a bit of color to the banner. On the right is a closer view.
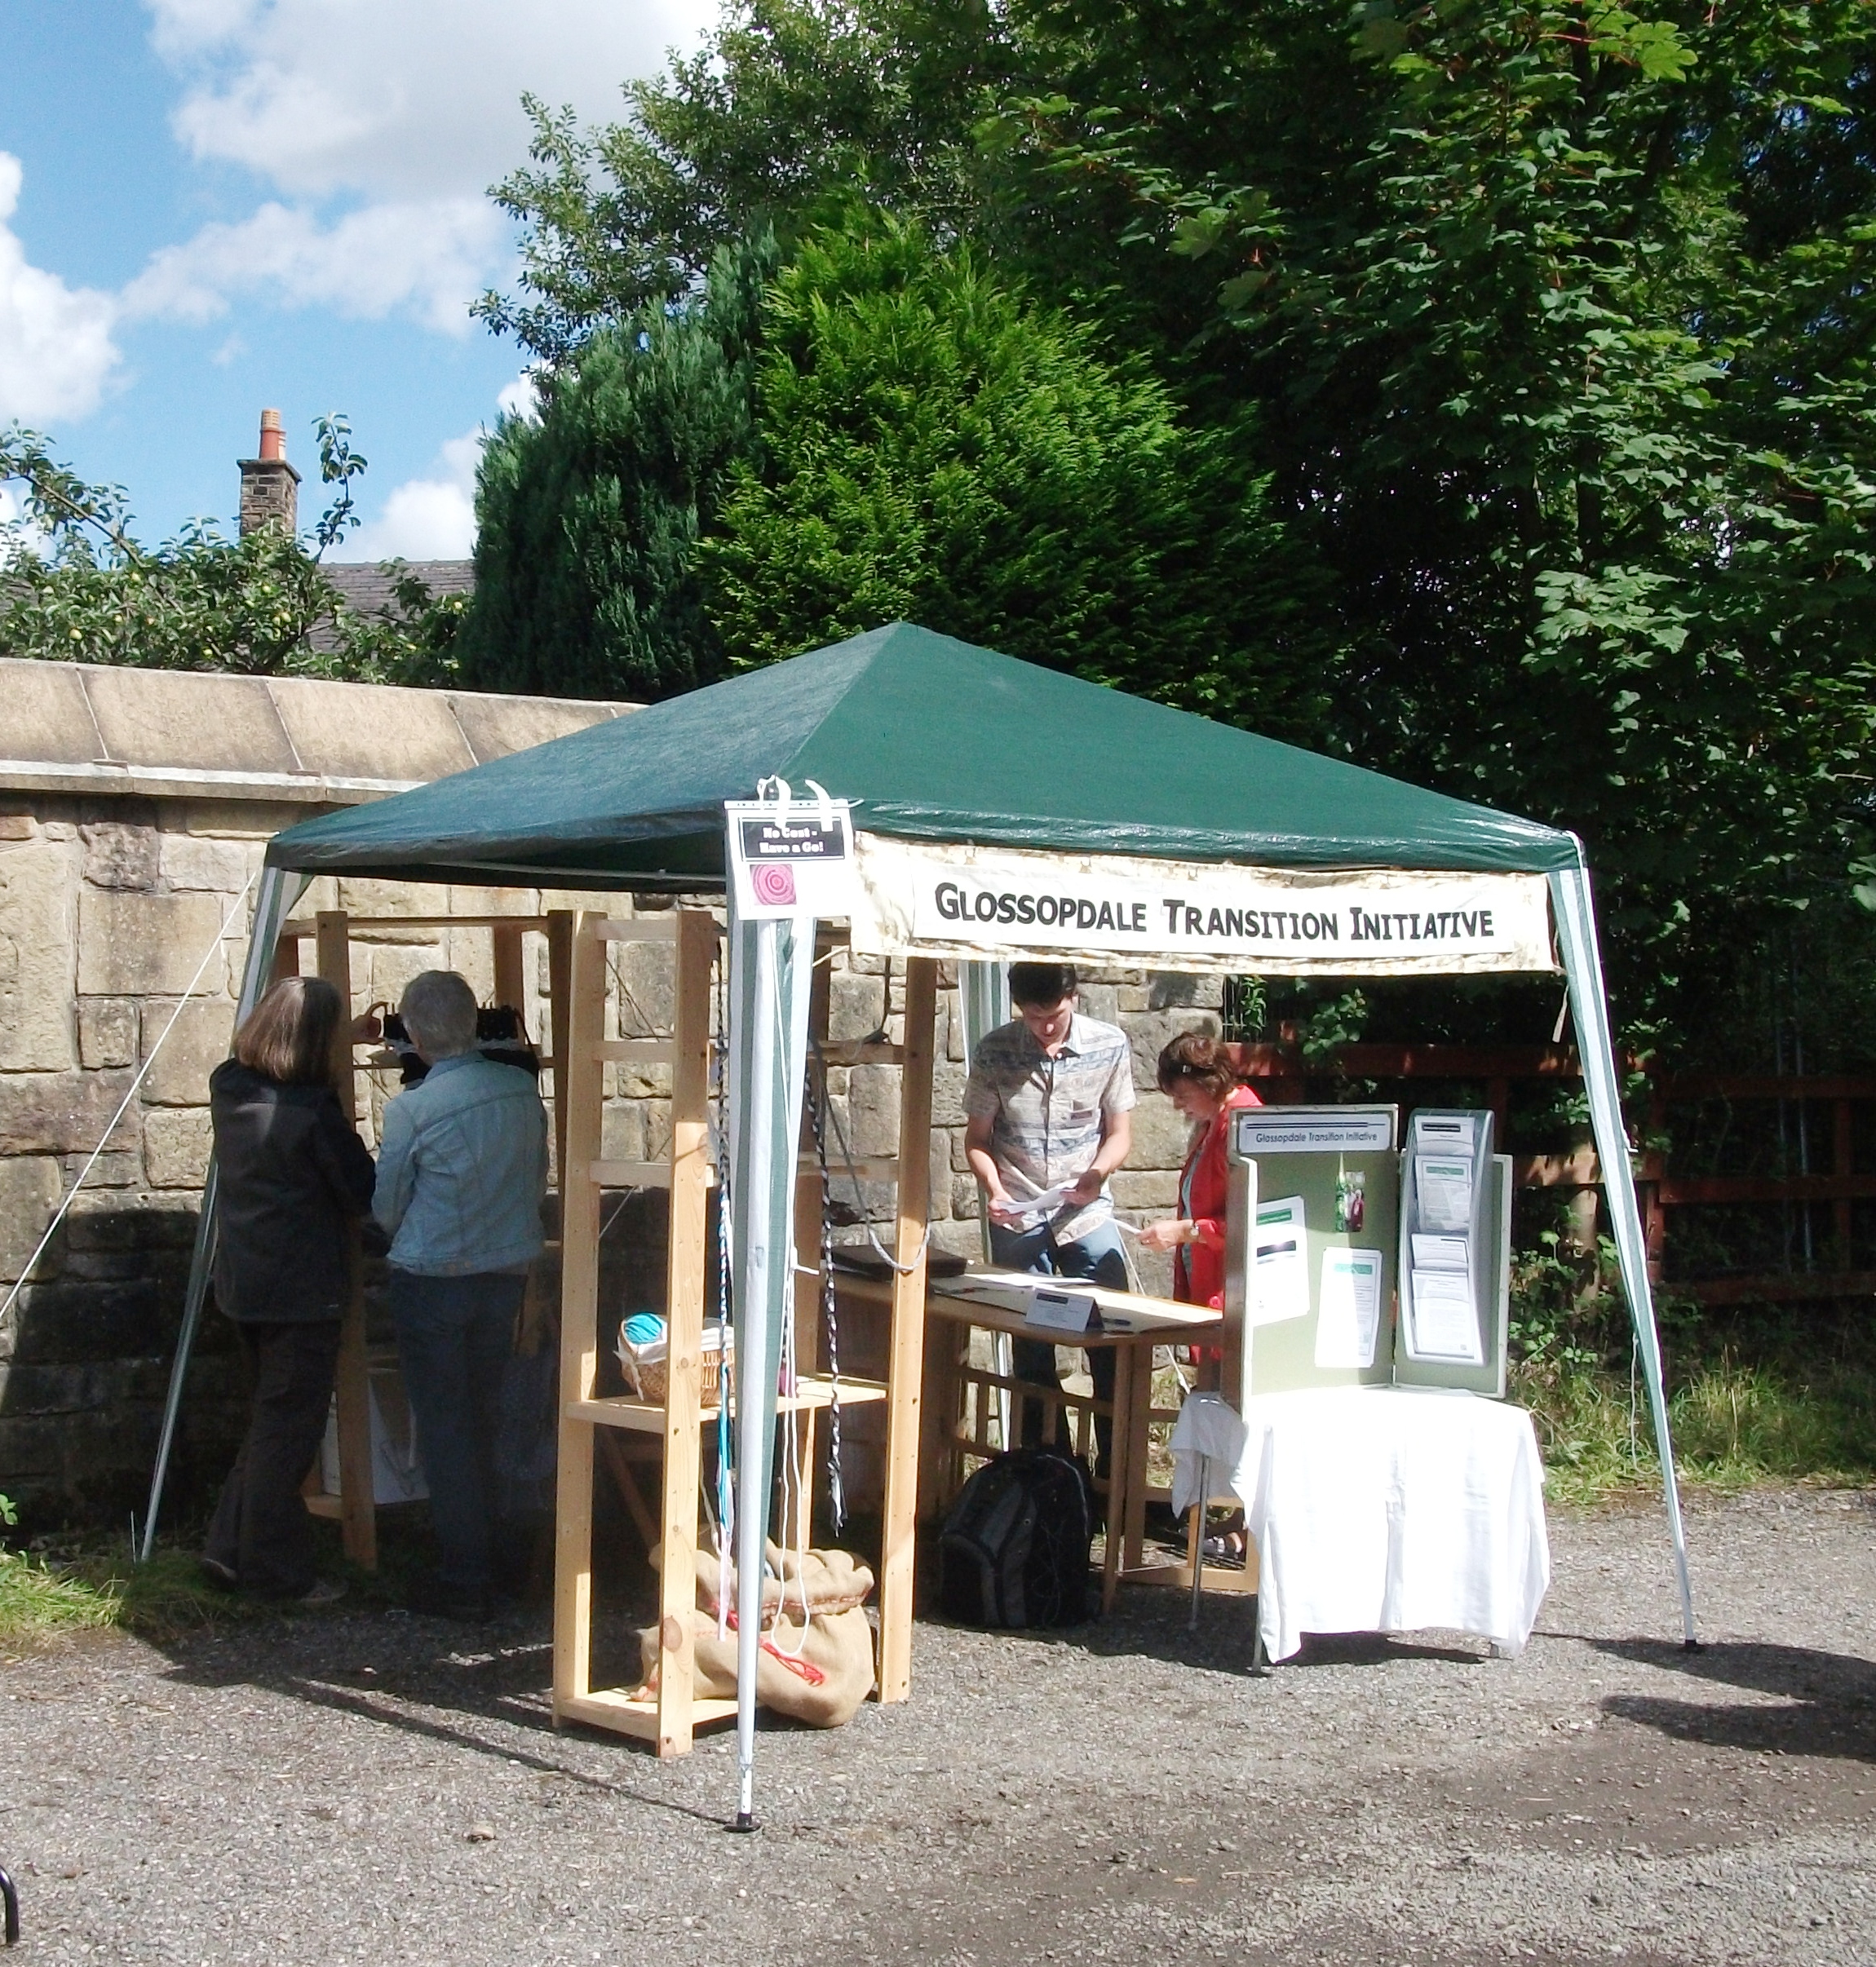
The banner in use again! This time it’s at Inspire Festival, 3 August 2013. You can also see the smaller of the display boards that Chris made, off to the right.
The banner all folded up for storage. It takes a couple of minutes to fold it up, to line everything up just right because of the weights, but it does fold. That’s how it’ll look most of the time, provided I put it somewhere the cat can’t sit on it (and shed on it). 😉
I’m quite proud of this banner because I just made it up out of my head, and it all actually worked! I let it percolate in my head for awhile before commencing it, and thought up a few different design elements to incorporate, so it became a bit more than just “stick letters on a long piece of fabric and be done with it.” Every design element actually worked; I didn’t have to abandon any of my notions. None of them are perfect, but they did all come together. It does the job, too, which is always good.
I didn’t actually realize I was horrifying Chris in the process of this til I heard him on the phone telling someone about it: “When I do a project like this, I get out AutoCAD and all sorts. I think she had scribbles on one sheet of paper.” Hee. It was four sheets, actually. 😉 After I heard him say that, I horrified him further by actually showing him and walking him through my “scribbles.” He just kept shaking his head. He can’t say much – clearly my process worked!
\o/ Wow, that banner looks amazing!
The mere thought of starting on such a project would have been too daunting for me ^^; Go you for getting it done.
By the way, I love those blue arrows on your blog. They’re very classy/professional.
Thank you very much!
Nah, it needn’t be daunting: just take things one step at a time and it’ll get done. I’m just relieved it got done in time!
And thanks – I love these blue arrows, too. Chris gets all the credit for making them – I’m very lucky to have him. 🙂
Wizards, those people who can make things with needles and sewing machines and such. The banner looks quite nice.
Aw, thanks. 🙂 Here, I think wizardry is … many other things. Sewing is just logic, really.